• Skip to main content
  • Skip to after header navigation
  • Skip to site footer
INFINITY Aerospace

INFINITY Aerospace

Made in the U.S.A.

Veteran Owned|Lighted Gear Switch ( LGS )|Stick Grip Pivoting Spacer ( SGPS )|Stick Grips ( HOS ), Military Style|Made in the USA|Landing Gear|Fighter Aviation Spoken Here ( Check 6 & 12 )|Canard Sport Aircraft Quick Build Kit
  • Home
  • About Us
  • Featured Products by JD
    • Military Style Stick Grips ( HOS )
    • Stick Grip Pivoting Spacer (SGPS)
    • Lighted Gear Switch ( LGS )
    • Infinity 1 High Performance Quick Build Kit Canard Sport Aircraft & UAV
    • Wing Root & Flight Control Spherical Bearings for Canards
    • Emergency Release Valve and Blow Down Bottle
    • Canard Retractable Main Landing Gear
    • Custom Landing Gear Design
    • Area 51 Poster
  • Other Products
    • Pre-Oiler and Back-Up Engine Oil Pump
    • MATCO Aircraft Wheels, Brakes, Axles & Parking Brake Valves
    • Michelin Aircraft Tires & their Leak Proof Tubes
    • Click Bond Aircraft Fasteners
    • Limit & Indicator Switch
    • Fiberglass Cloth Rolls
    • Other Highly Recommended Products
      • “Top Gun Days” – 3 Books in 1: JD’s the tallest one in the center of the group picture near the middle of the book
      • E-Glass and Carbon Hinges from Barrett / Garrett Enterprises, Inc.
      • Para-Phernalia, Inc. — Emergency Parachutes
  • Coming Soon
    • Throttle Handle & Quadrant (HOT)
    • Oleo Nose Strut for Canards
    • JD’s Black Box
  • What Else?
  • Contact Us

Military Style Stick Grips ( HOS )

*** IMPORTANT – PLEASE READ ***

We don’t mean to upset you by asking you to read everything on my Stick Grip pages, but we offer a HUGE service to our customers ( no one else in the world does this ! ) by offering 65,536 switch combinations of Right and Left Hand matching Military Style Custom made Stick Grips, wired up with the switches of your choice, for only $225 / $234 cc each — ONLY ones like them in the world !  These Stick Grip pages are VERY helpful to you in figuring out which kind of switch you want in which position of your Custom Stick Grips.  In fact, probably 99.99+% of all your questions are answered on our web site.

We have years of experience ( since Jan. 1994 ) in making our Stick Grips for thousands of customers, for thousands of aircraft, and hundreds of applications, world wide.  If you just pick up the phone to order without knowing which switches you want in which positions, you’ll end up spending a bit of time going back and forth on the phone researching out your needs and options.  The intent of my Stick Grip pages is to save you ( and us ) time and $money$ 🙂 .

Soooo, PLEASE thoroughly read through all the information in the tabs below to help you figure out what switches you want installed in which positions in your Custom Stick Grips, extra length of cable you may want ( ~2.5 / ~76.2 cm feet of cable out of the bottom of the Stick Grip is standard ), whether or not you will need a spacer(s), and what size spacer you need, or order our ergonomic Stick Grip Pivot Spacer, co-pilot isolate switch, relays, and more.

Again, thank you ever so much for your understanding and support !

Click on any colored words on our site for more info.

  • Description
  • Testimonials
  • Features
  • Options
  • Installation
  • FAQ's
  • Pricing
  • Delivery
  • How to Order

Description

You’ve spent years and thou$and$ on your Dream Machine ! Do you imagine flying your Pride and Joy with a Military Style Stick Grip ( from either seat ), or with other attempts at making a stick grip, such as using just a soft bike grip, ski pole handle or dowel rod that you stuck a couple of cheap switches in, which would be labor intensive to make and wire at best, that turn ON ( make contact ) if you bump them 1/200th of an inch ( our Stick Grip switches WILL NOT do this ), and that the only way to mount it is to glue it on ( then always wondering not if, but when, it will come off ) ?!?

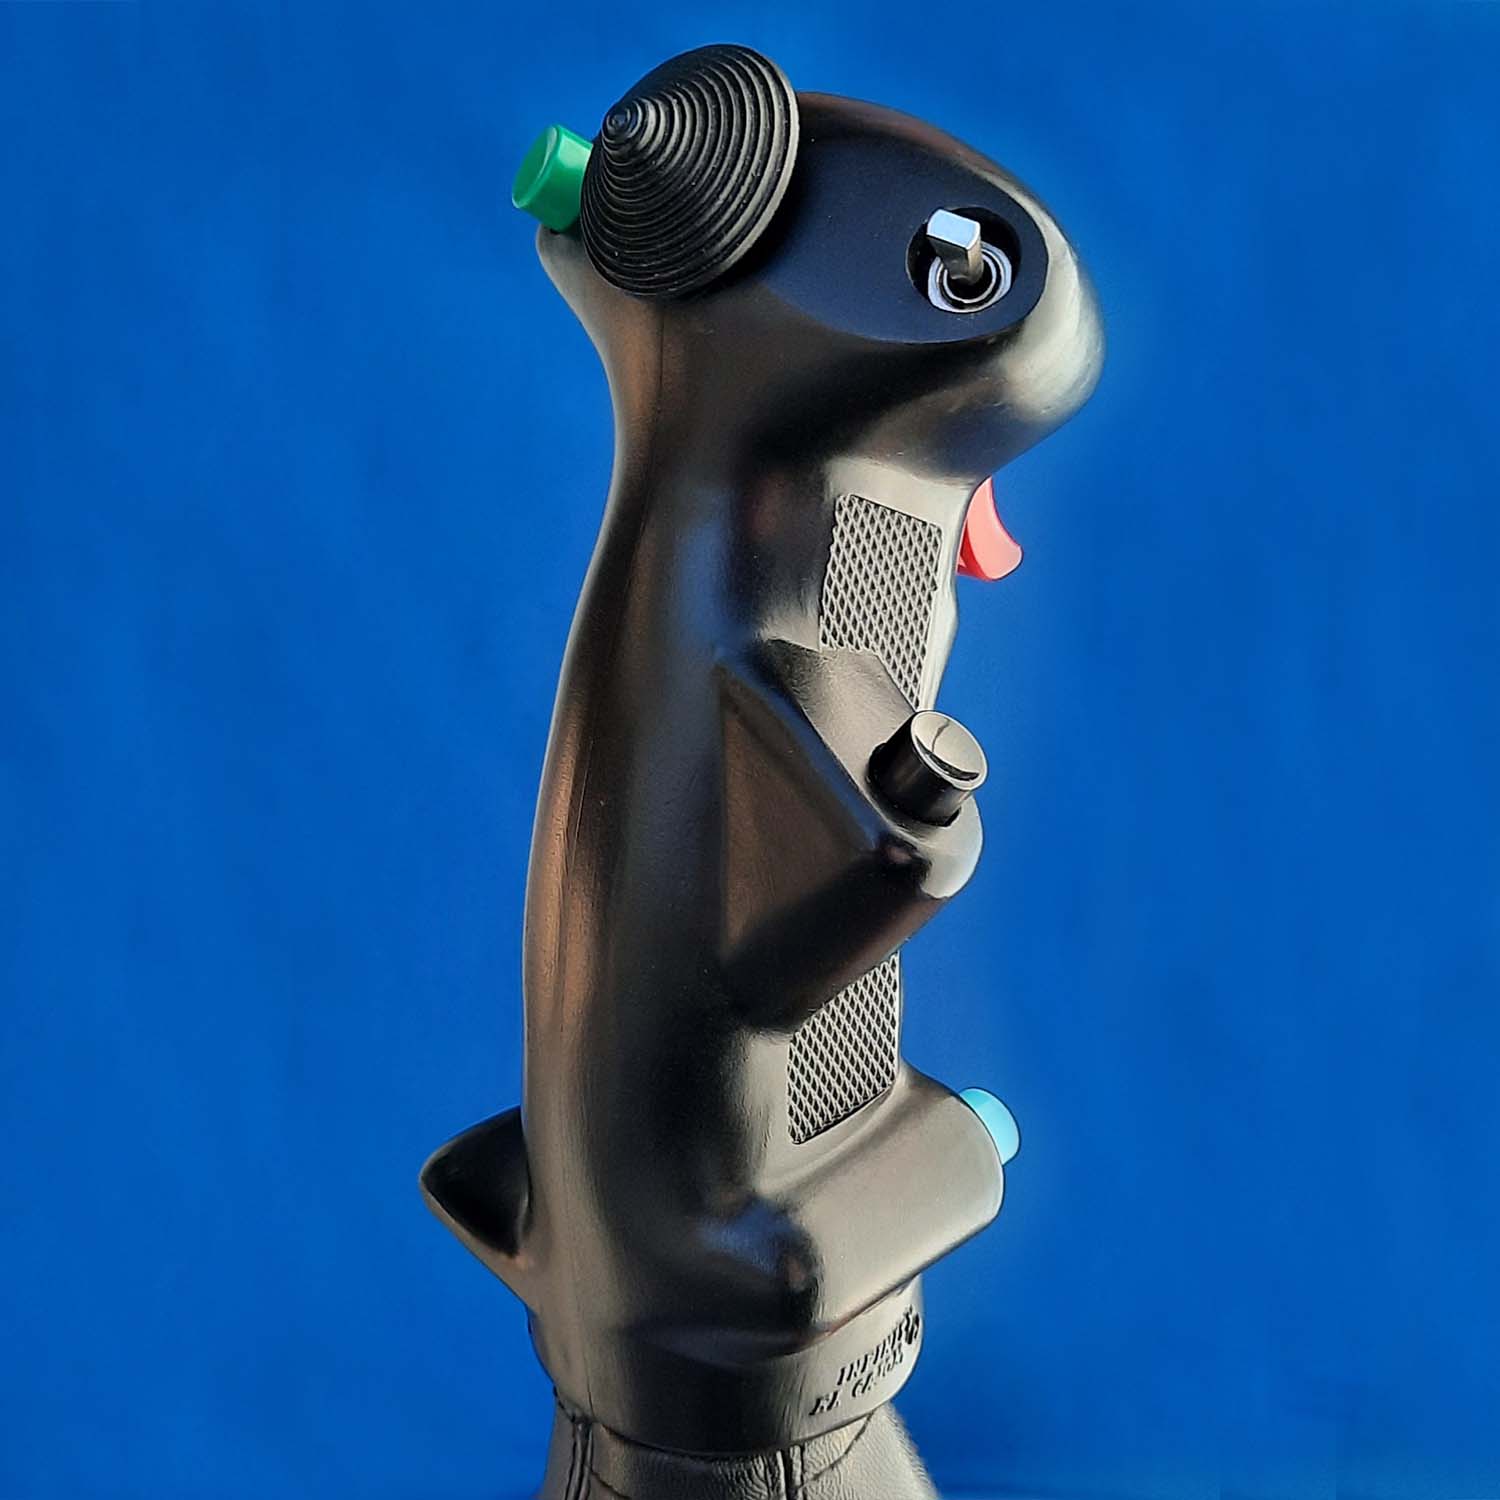
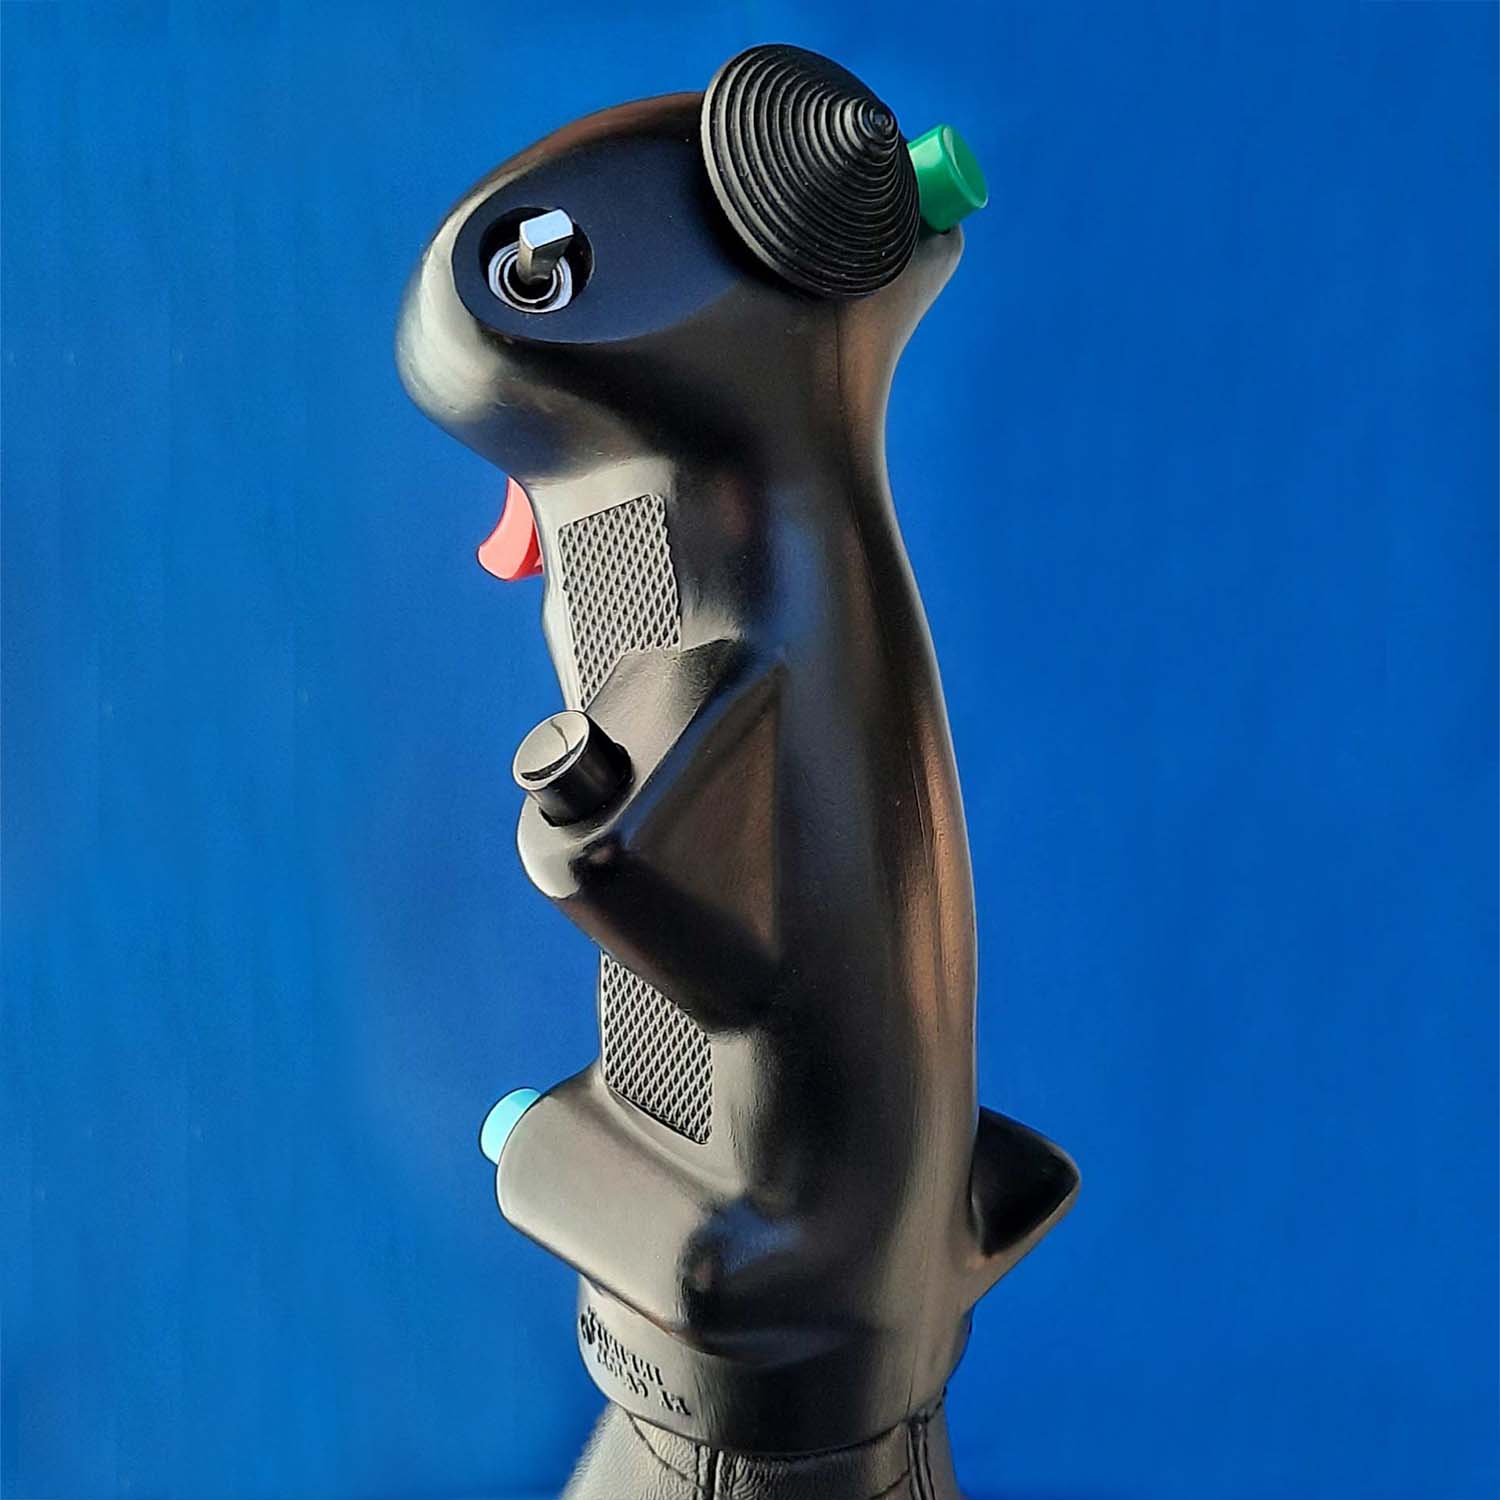
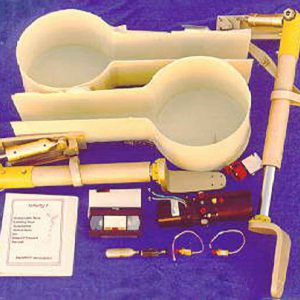
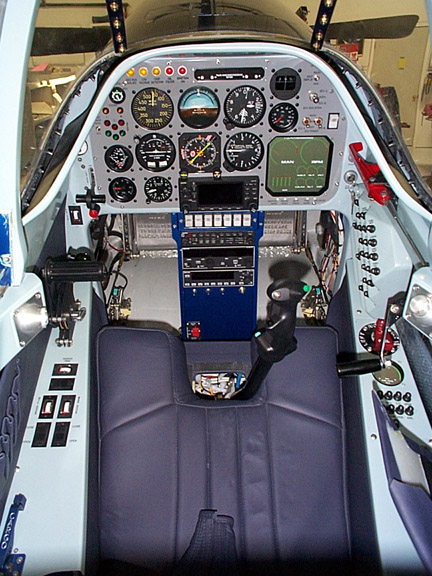
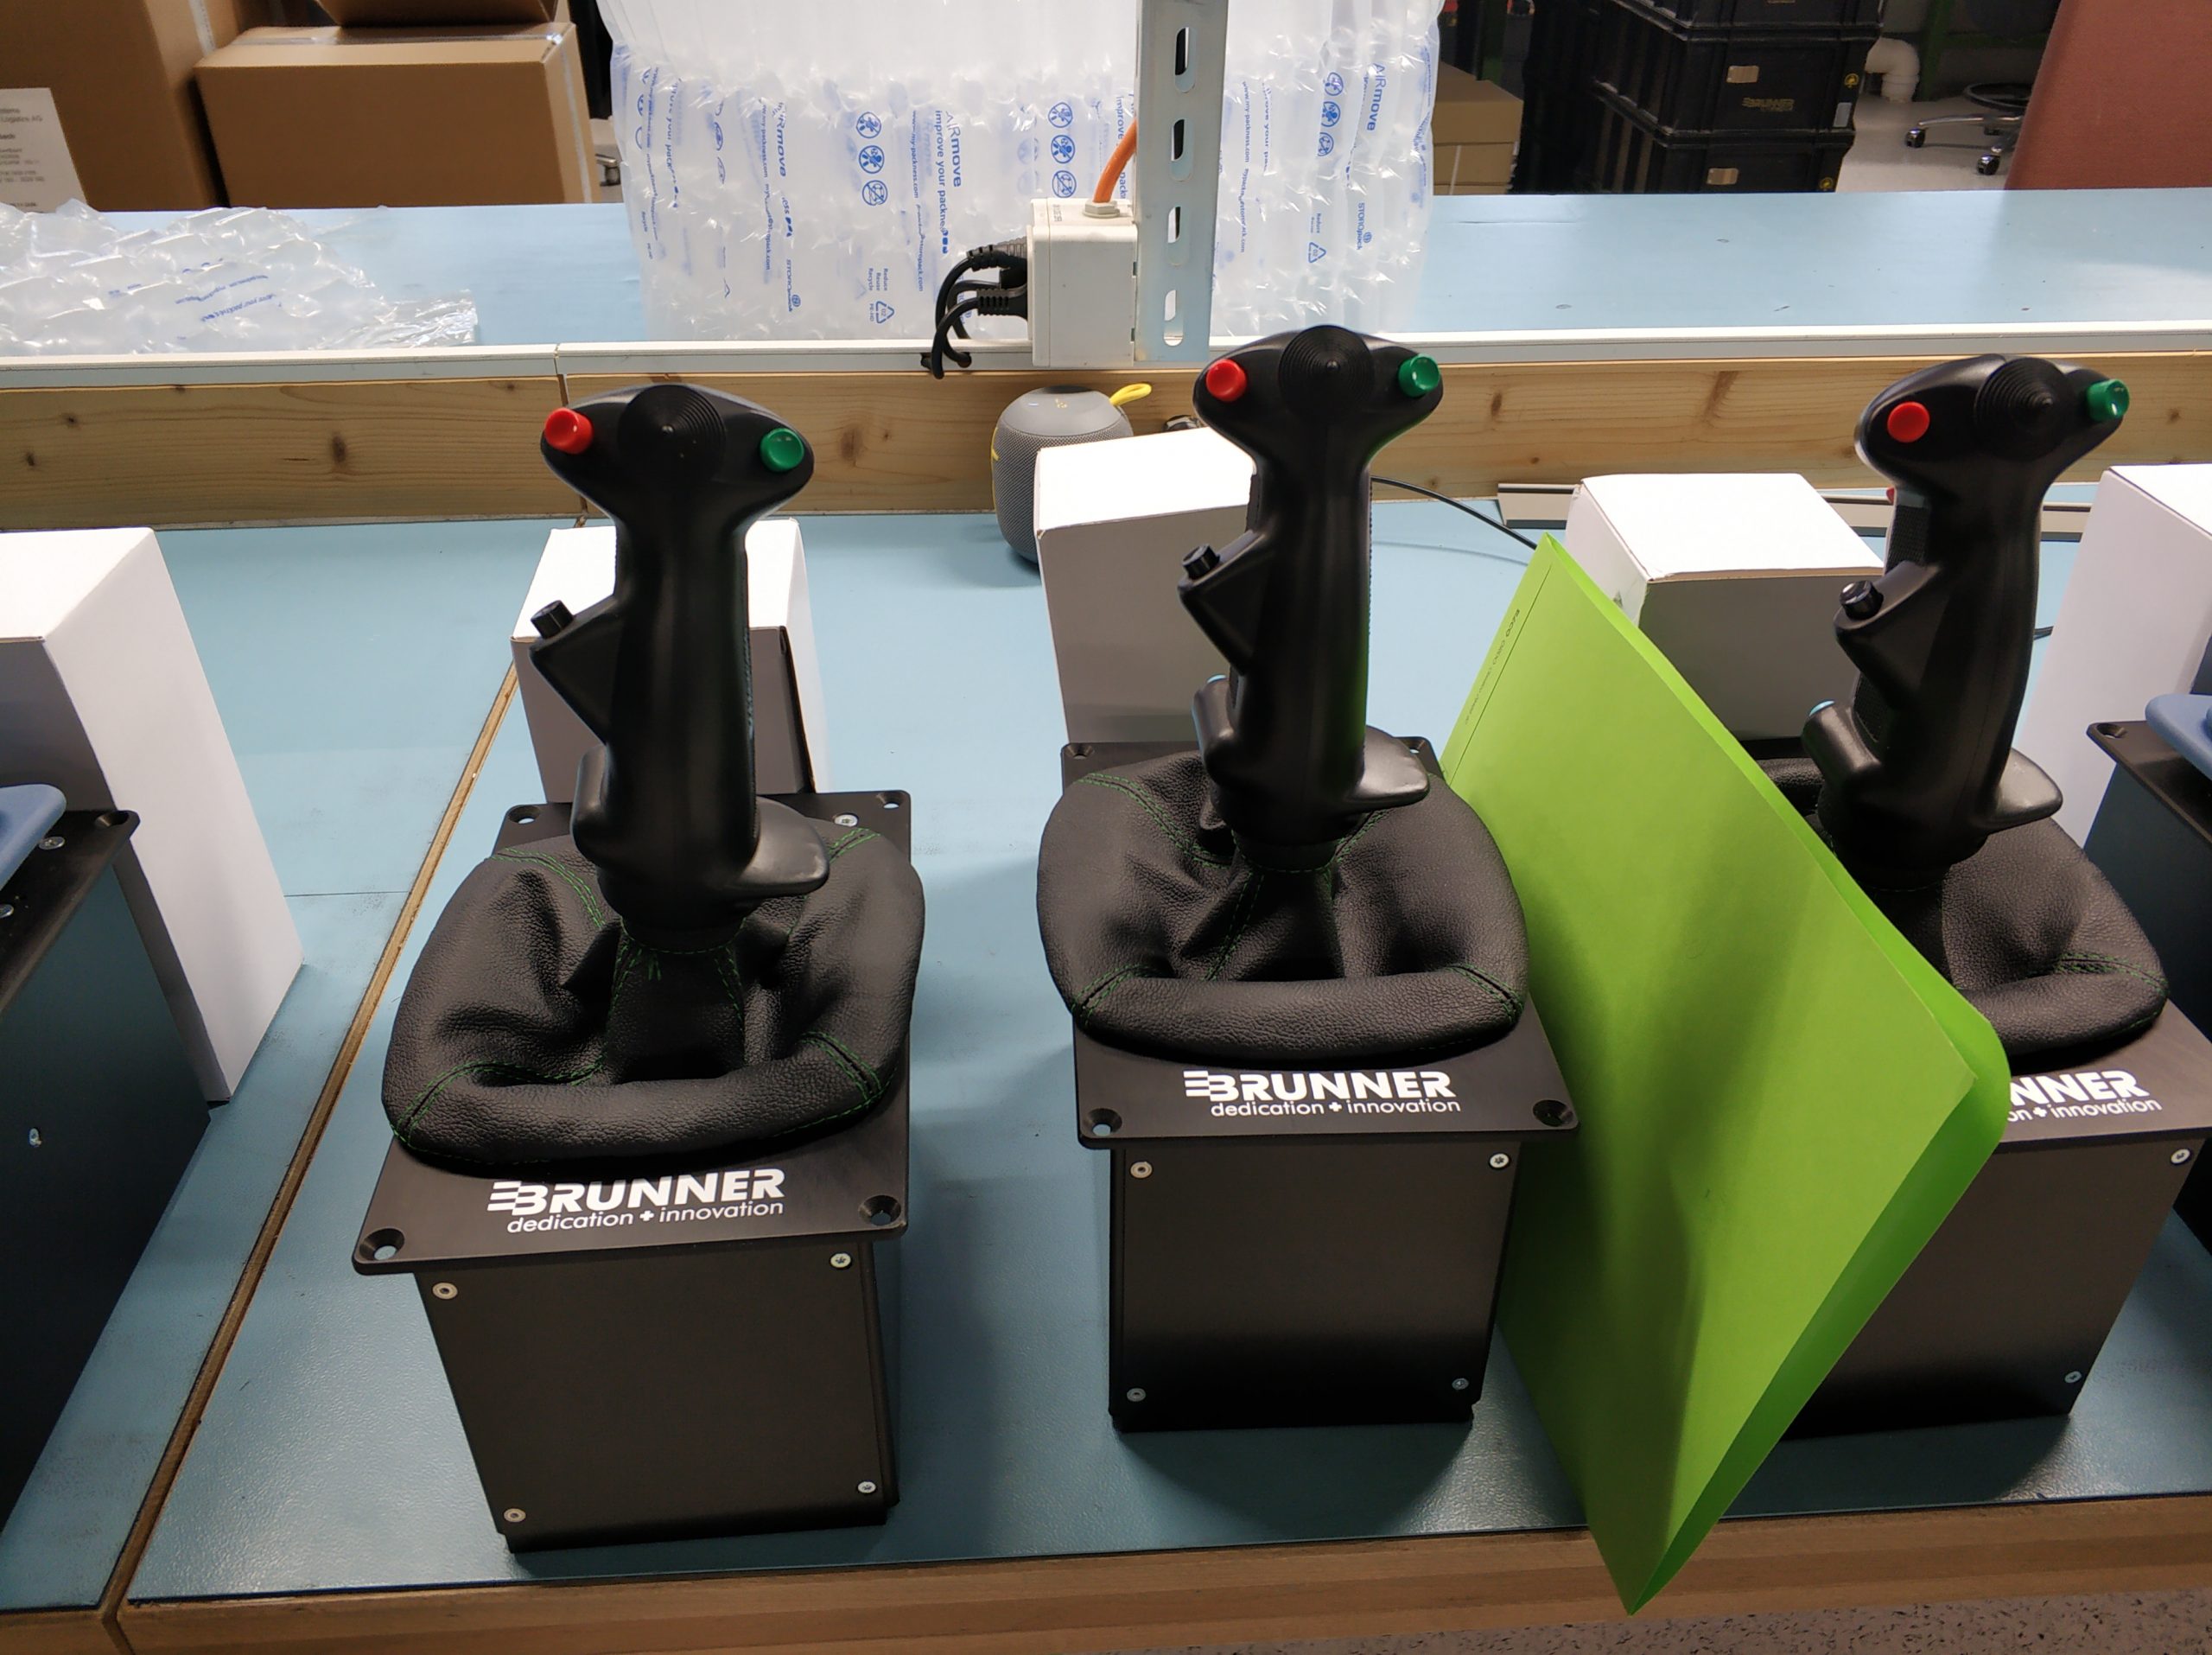
Our Military Style Stick Grips (HOS) — that are standard issue in our Infinity 1 Quick Build Kit Sport Aircraft — are a high quality original, similar to the grip used in the F-4 Phantom, F-15 Eagle, A-6 Intruder, Cobra Gunship, Bat Plane, SeaQuest, etc., but is about 0.5″ shorter and a little smaller in girth than the military versions to better fit the average size human hand without a glove, and has 6 individual Switches ( 9 switches total ) controlling 9 to 13 Functions — no other Stick Grip for Sport Aircraft in the world can control this much !

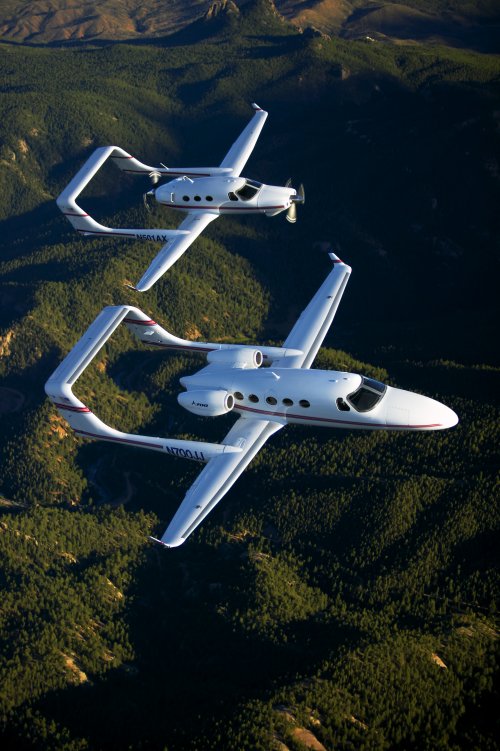
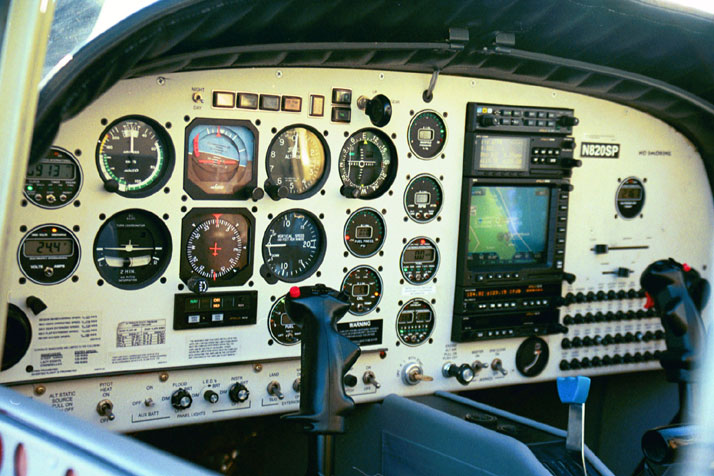
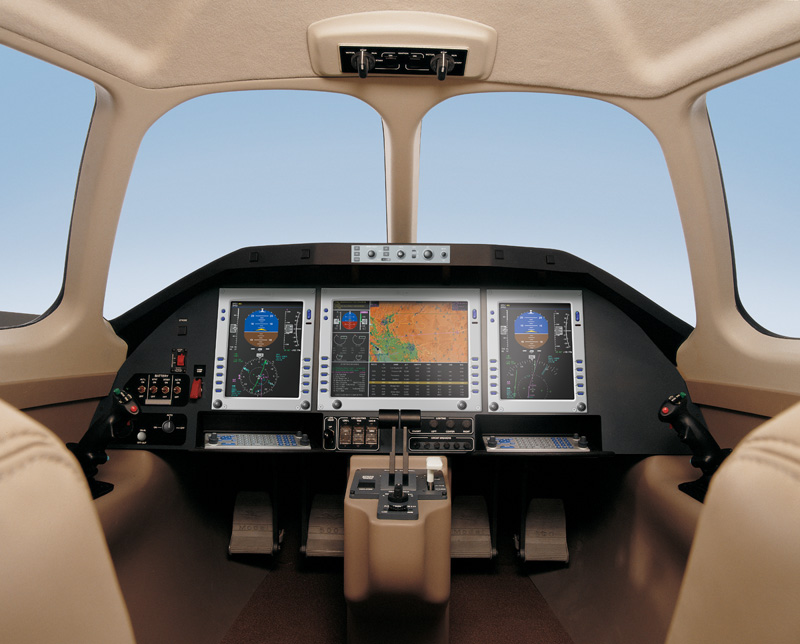
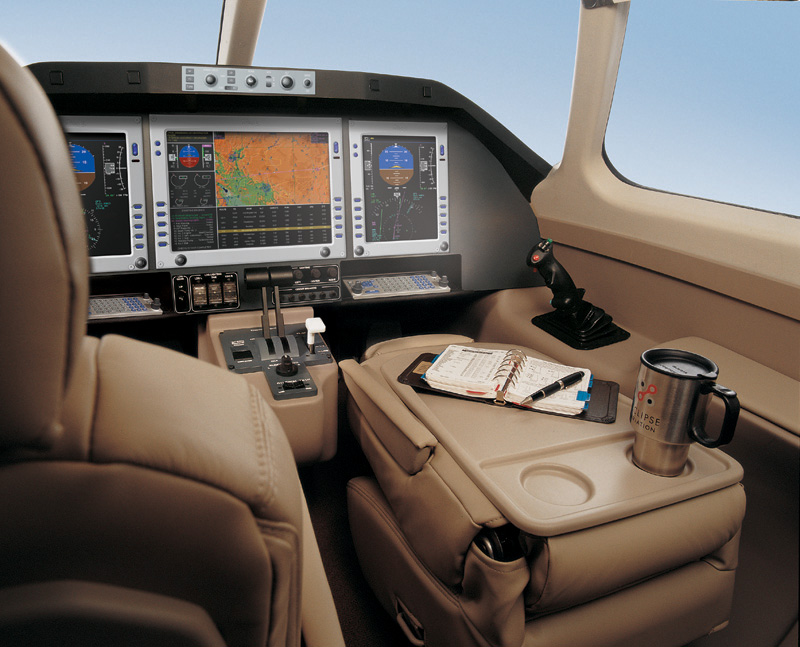
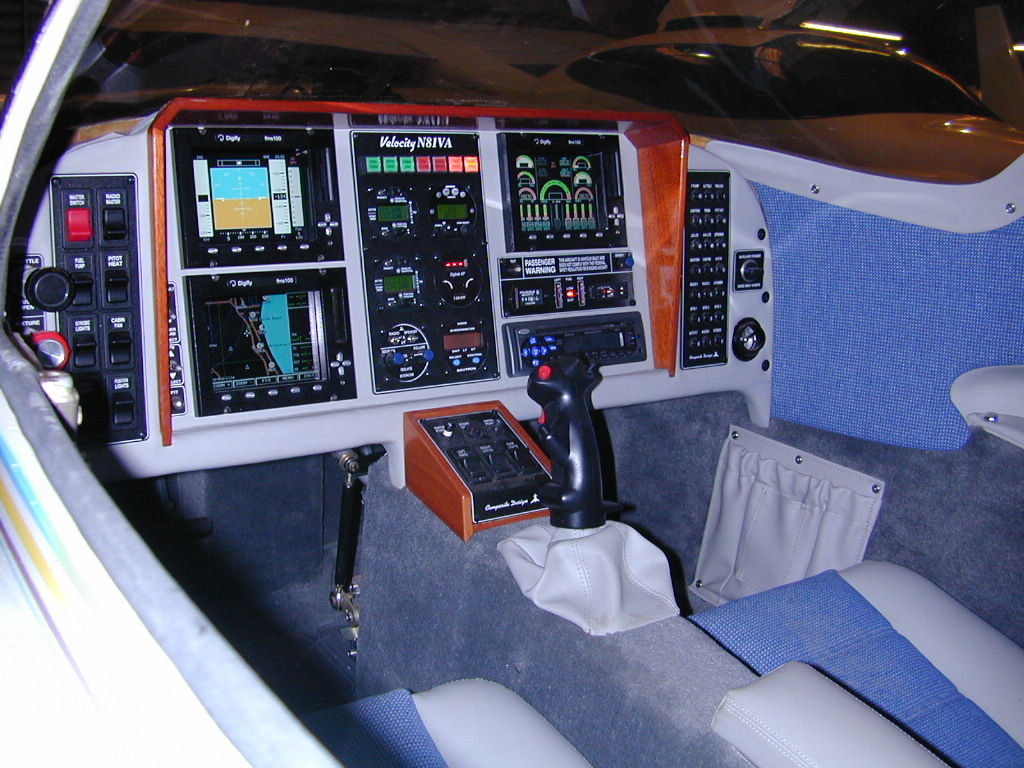
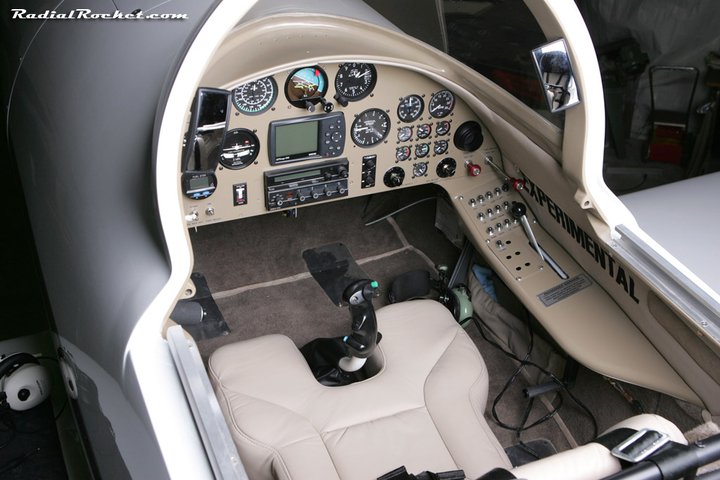
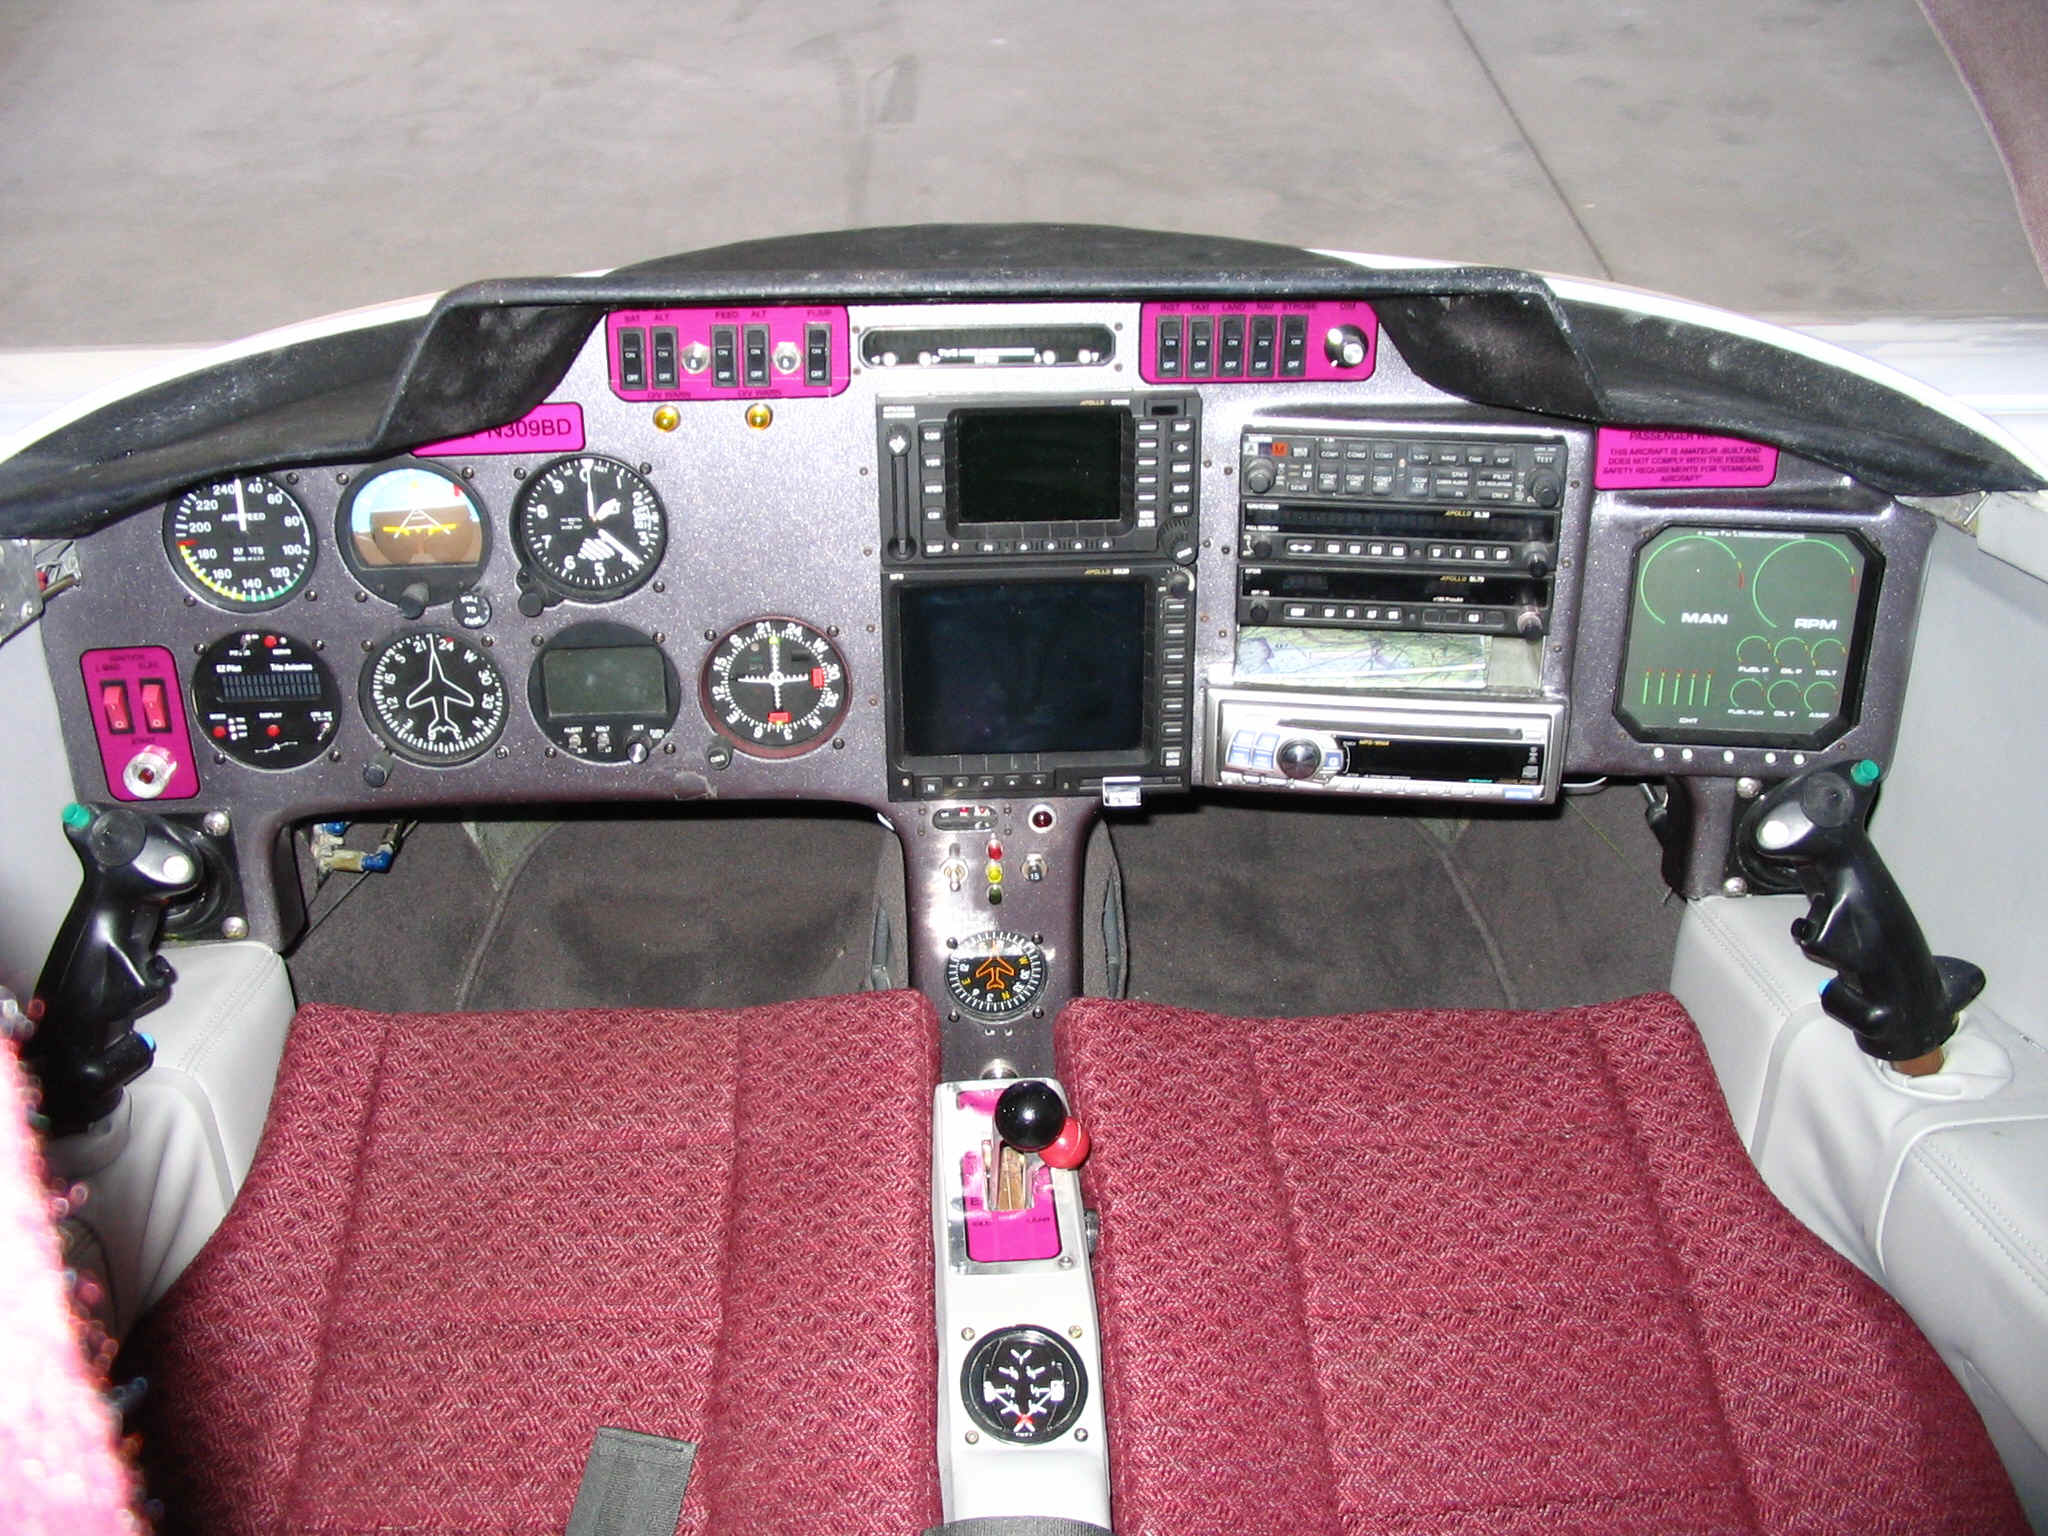
Thousands have already been installed in hundreds of makes and models of aircraft world wide since 1992 ( even a 314 foot custom Yacht, and several 1 and 2 man submarines ! ). FAA certified in the Adam Aircraft, Micco and Eagle FAA certified aircraft. Field approved in Brantly, Bell 206, Hughes 500, Enstrom, Hiller and most other helicopters ( but not the Robininson ), Aero Commander 500 A’s, Mooney’s, Cessna’s, Swifts and in blimps. Standard issue in several of today’s finer Sport Aircraft Kits, such as the Thunder Mustang. Can be seen in the prototype Piper Jet, Viper Jet, Express, Legend, Sherpa, Lionheart, Rutan Boomerang, Maverick Twin Jet, Carter Copter, Adam Aircraft, Eclipse 500 ( and their cockpit demo ), Jim Dunn’s Fuel Cell powered E-Plane, John Sharp’s Nemesis NXT, Dick Rutan’s beautiful red, white and blue Berkut, Wayne Lanza’s Velocity, Jeff Auckland’s Radial Rocket, Brian DeFord’s Blonde Streak, Greg Richtor’s Jet Cozy III, Grant Nicholls’ Jet Long-EZ-RG, Lance Hooley’s Jet Long-EZ, Steve Wright’s StaggerEZ , and many, many others. Also, installed in Wayne Handley’s turbo-prop powered Turbo Raven air show demonstration plane ( see cover story of April ’99 issue of Sport Aviation magazine, page 22 ), in Duane Upton’s Swift of the Swift Magic Team, and in Bill Cherwin and in Gary Donovan’s yellow T-34 of the Lima Lima Flight Team. Can be seen in the Cafe Foundation article about Mark Beduhn’s Cozy MK-IV ( ‘Sport Aviation’ April ’99 issue, page 59 ), in Jean Prudhomme’s Velocity shown in the April ’99 Kitplanes article page 7, and in Bob Warner’s article on page 95 in Sport Aviation’s July ’99 issue, and in many other articles and pictures of aircraft in many magazines. In fact, our Stick Grips are in someone’s featured aircraft, and/or in an ad, in just about every flying magazine these days, whether our Stick Grip is specifically mentioned and/or pictured, or not. Also, installed in military planes such as T-38’s, Mig’s, CJ-6A’s, T-6/SNJ’s, P-51’s, L-39’s, Yaks’s, Marquette’s, and more. Select custom instrument panel manufacturers provide only our Stick Grips as standard issue with all their custom panels. Used in simulators at Edward’s AFB, the FAA in Oklahoma City and the Navy in Texas, Wright Patterson AFB, and Eclipse 500 sims, and by NASA to control their UAV’s ( Unmanned Air Vehicles ) ; sims made in Canada, sims made in Europe, sims made in Austria, sims made in New Zealand, Swiss Brunner Sims, and sims made in Australia. Used in crop dusters and turbine ag planes; by the US Post Office controlling robot arms to pick up huge mail boxes to put them through GAMA Radiation machines to kill Anthrax after 9/11 ; for SWAT bomb retrieval robots ; used by the Worlds Fastest Female on a motorcycle ; to control electric wheel chairs ; to drive handicapped vans ; Toyota Camry engine assembly line machining ; Ford Motor Company in a futuristic car ; fire trucks to aim and shoot the foam nozzle and operate other accessories ; to drive and control Principia’s Solar Car; as a shifter in Corvettes, jeeps, Ford F-150, 2005 Mustang, race-modified 2002 Toyota Celica GT-S Supercharged car, and off-road vehicles, controlling CD players, Nitrous Oxide, smoke and various other vehicle systems / functions ; controls the bug pincers in the movie Starship Trooper, can be seen near the beginning of the movie Miami Vice in the Adam 500, 1+40 minutes into the movie Oblivion you can see 2 right hand Stick Grips, Batman has a left Stick Grip in Batman vs Superman, 3 Stick Grips in Fast & Furious 8, Transformers Bumble Bee, and Open World ; Virtual Reality ( VR ) games and simulations ; Aces Flight Simulators that was at the ‘Mall of America’ for 13+ years; used on a Caterpillar Excavator for the Harlem River Tunnel ; and many, many thousands more!

Remember, our Stick Grips are ***NOT*** glued on or held on with just a set screw, but they *clamp* over the top of your stick tube with a screw through your stick tube. See Installation Drawing.

INFINITY Aerospace designed this Stick Grip with safety, comfort, functionality and durability in mind for our Infinity 1, that also fits all aircraft. The anatomical ergonomic design is contoured to the shape of your fingers, and includes a fatigue reducing hand rest at the base. Made from a high impact and flame retardant material. The non-glare black finish is abrasion and impact resistant for long life, yet easily repairable. Stick Grips and Throttle Handles with switches built into them ( both used together are called a HOTAS system ), should be standard issue in ALL aircraft for they greatly reduce pilot workload, increase pilot efficiency, de-clutter the instrument panel, and make flying the aircraft much safer, among other things. But note: OUR Stick Grips also have ergonomically located switches so they cannot be accidentally bumped ( unlike some other stick grips and home computer joy sticks ), yet are still easily reached.

Definition INFO:

The term “HOTAS” is used in the military and airline worlds, and stands for ‘Hands-On-Throttle and Stick’. Also, JD came up with the terms “HOT” which stands for ‘Hands-On-Throttle‘, and “HOS” which stands for ‘Hands-On-Stick’.

A Few More Definitions:

VDC = Volts Direct Current ; PSI = Pounds per Square Inch ; GPM = Gallons Per Minute ; LPM = Liters Per Minute ; AMP = Amps or Current ; CB = Circuit Breaker ; N.O. = Normally Open ; N.C. = Normally Closed ; S & H = Shipping and Handling ; CA = California


News — EAA Oshkosh 2014 Grand Champion Bill Ford’s Legacy RG has our Stick Grips. PLEASE NOTE: Most all Grand Champion and Award Winning aircraft at an airshow have our Stick Grips.

News — As of May 20th, 2004, our Stick Grips are FAA Certified in the Adam Aircraft A-500 and A-700 ! This is our 4th production aircraft in which to be certified as Standard Equipment.

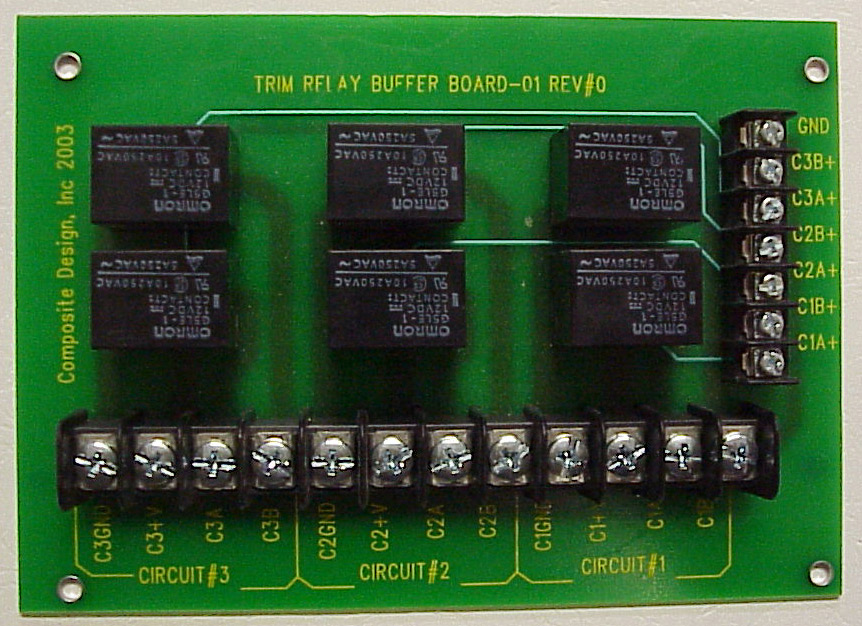
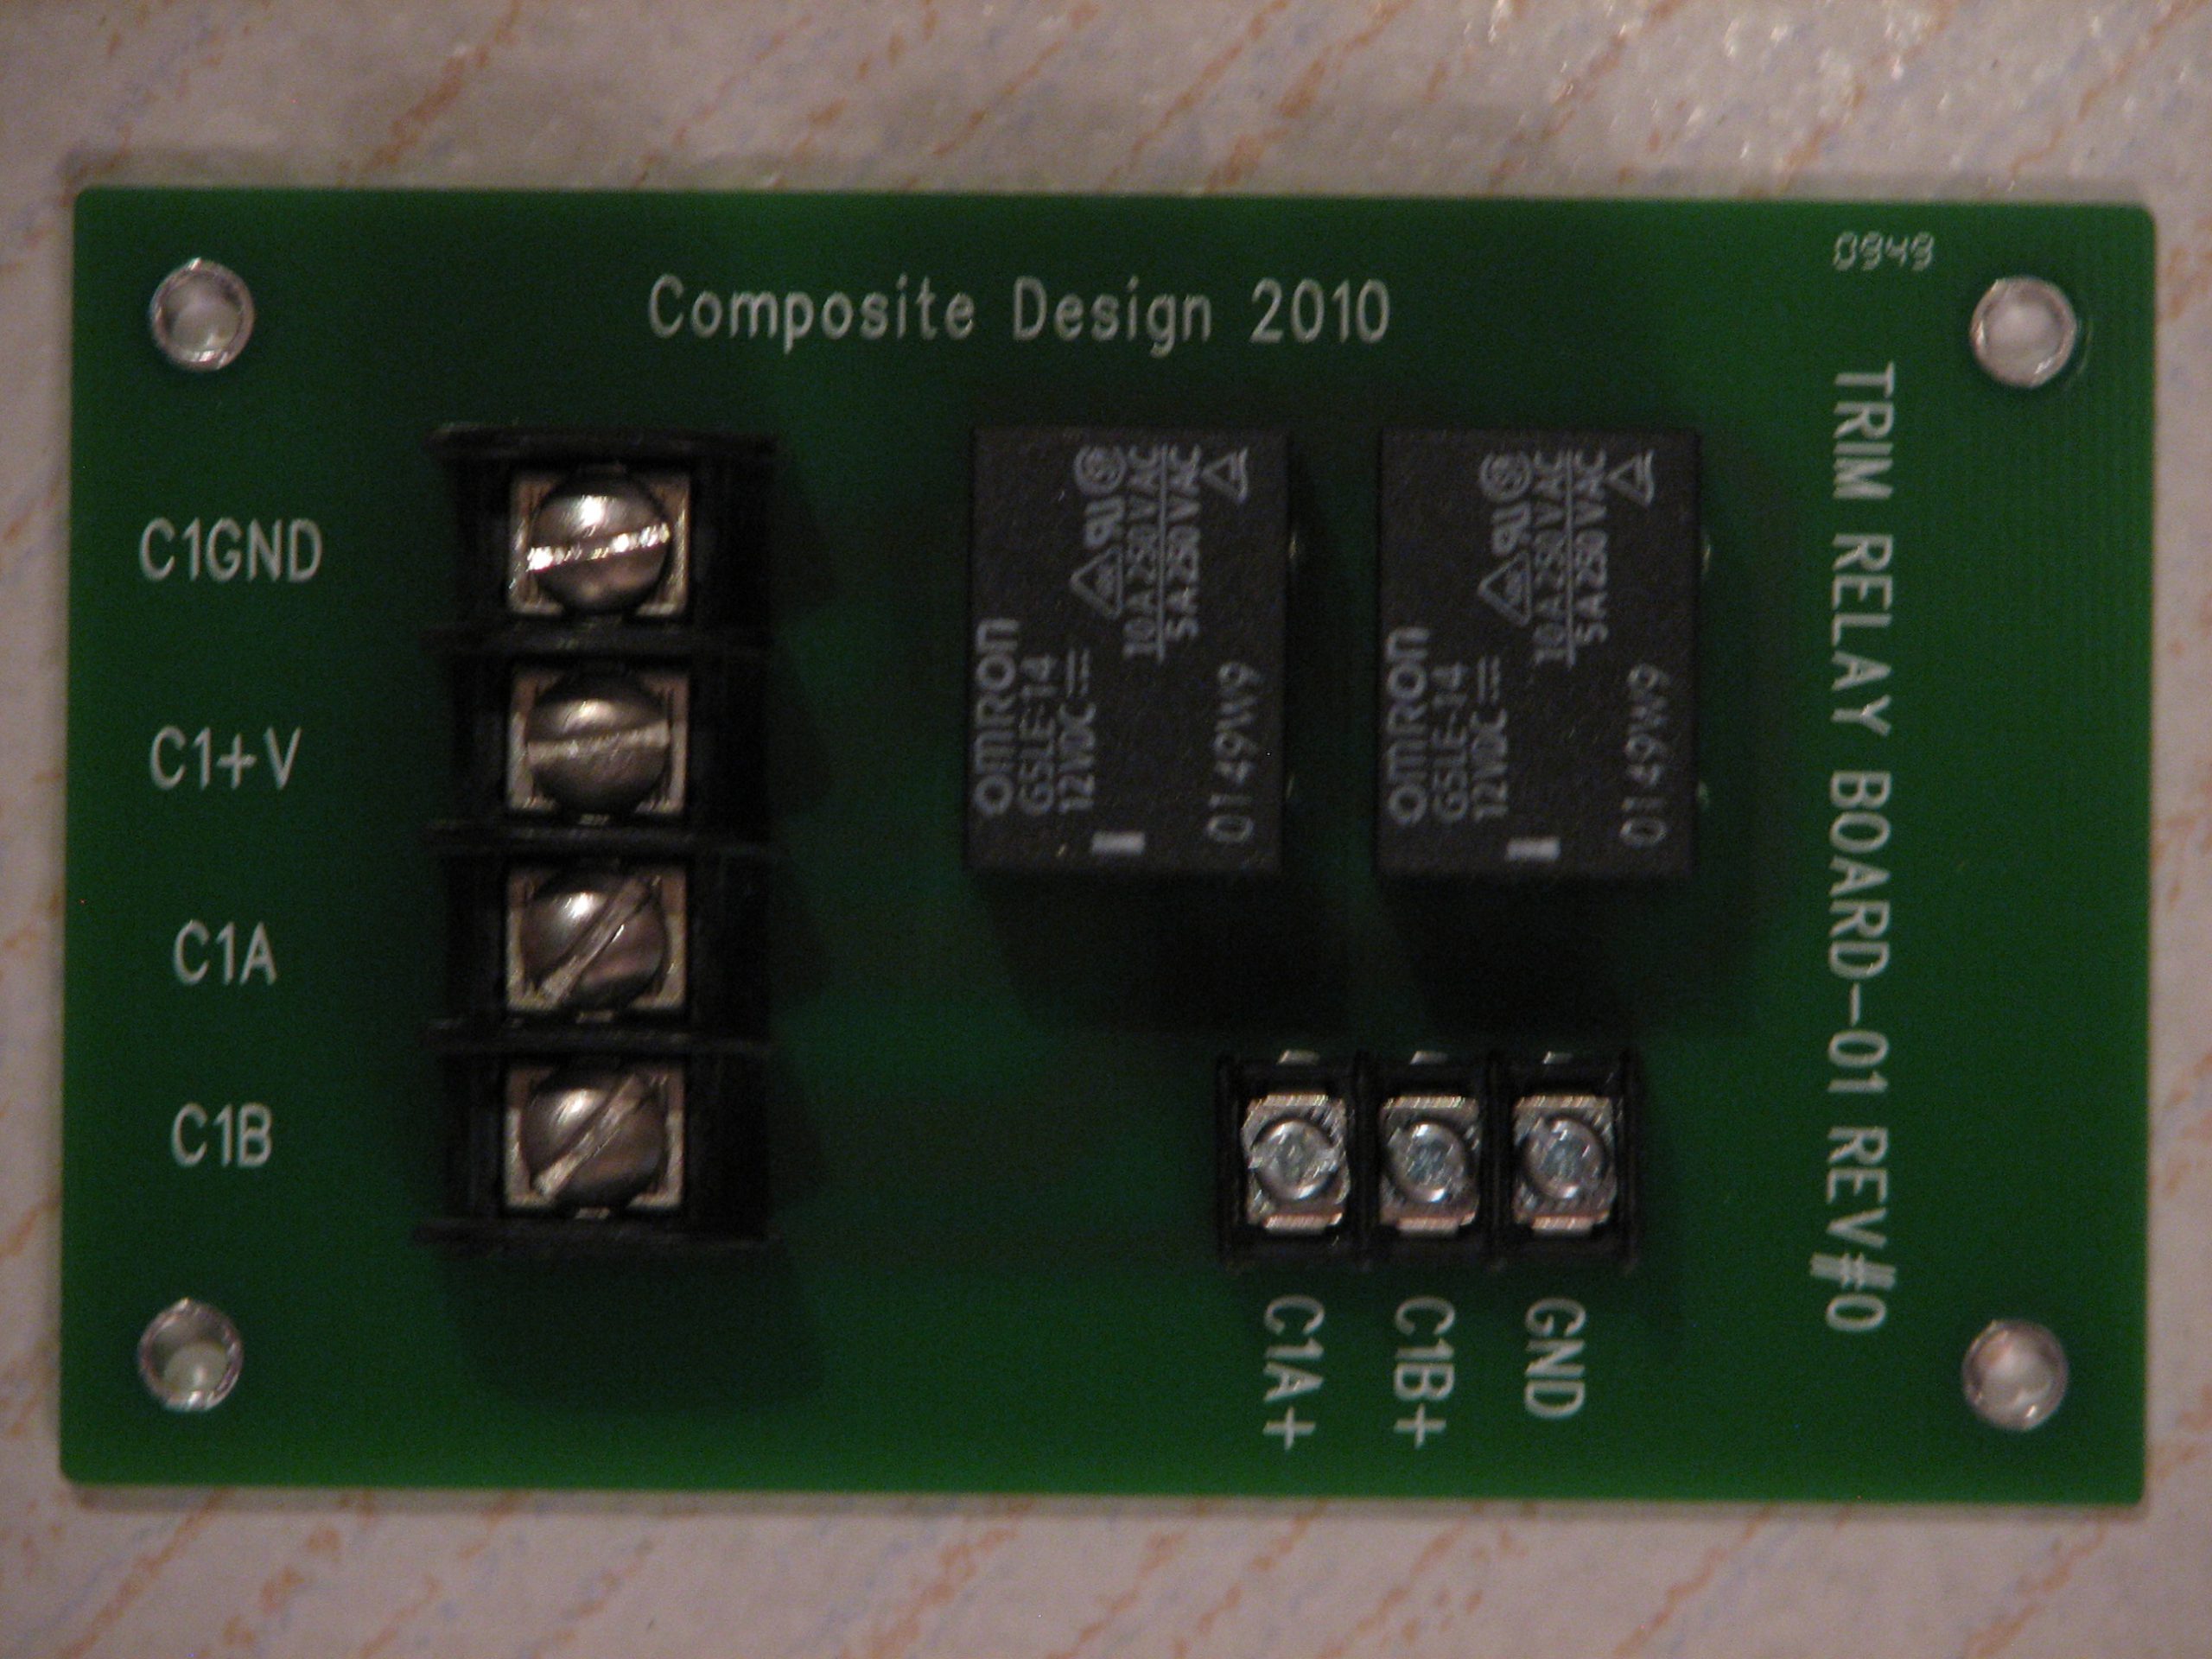
More News — We now have a threaded bottom for direct War Bird Stick Grip replacement ! It can also be used in ANY aircraft ( LEFT or right hand ) !! Also, we now have a Relay Deck !!!

And More News — Darryl Greenamyer has won the Sport Class Gold at Reno in 2002, 2003, 2004, 2005, and 2nd place in 2006, in his Lancair Legacy, which has our Stick Grip ! In fact, the first 4 planes had our Stick Grips !! PLEASE NOTE: most of the Reno Sport Class Race Planes are flying with our Stick Grips !!!

And Even More News — May 09, 2011: the Northrup-Grumman Firebird is flying with our Stick Grips ( see time stamp 1:04 ) !!!!

And the News Keeps Coming — you can see our Stick Grips in even more movies — Batman vs Superman, Fast & Furious 8, Transformers Bumble Bee, and Open World !!!!!

The grip saved my plane and most likely my butt to… during an engine out by allowing me to work the flaps, the Electric fuel pump and the starter at a very low level over the trees after a pulse fuel pump failure. With out a doubt the bests 160.00 i have ever spent!!!!!!!!!
THANK YOU FOR TALKING ME INTO THE PURCHASE. I have told every one it was the grip that made the quick save possible. Your companys product has my vote!!!!! THANKS THANKS THANKS!!

Thanks again. Bill. D.W.A.


Gary R. here, and I now have the RH INFINITY grip installed in my RV3A. AWESOME!! Absolutely awesome,,,,,,really. And to think I’ve been FLYING around with a silly old motorcycle (rubber) grip and a temporary (velcro) PTT, when I could’ve had ONE of these FINE pieces of MIL-spec quality, hand filling grips much, much earlier! The wiring diagram was cool too. VERY easy to understand. (even for and electron illiterate like me) The large wire bundle was a challenge, but, finally was overcome and corralled into the handle where it belonged. Thanks for a fine product!
PS: A fair price too! In this world of high-priced “AirCraft” parts and accessories!

Sincerely,
Gary (aka AJ)
INDY RVs flyout-director
(you only need one seat)


I ordered at Sun N Fun, they came in yesterday, and they lookk grreat

Thanks
Marshall J., RV-8, I hope


Stick Grips arrived today.
They look GREAT!!
Even better than I expected.
Thanks again mate
***Happy Holidays.***

Regards,
Ken G. , — 12 / 04 / 2012


Thanks for the awesome grips for my soon to be flying RV-14.

Dan B., RV-14 — 07 / 30 / 2020


Thank you for the work you do. As a former F-4 and F-16 driver, I can’t imagine flying without your grip.

Cheers,
Tom S. , RV-8 — 03 / 11 / 2021


Just got the grips, you sir ROCK. They are freaking AWSOME, love the quality and cant wait to fly this plena one day.

Thank You very much.
Frank L. , RV-7 — 03 / 23 / 2021


custom Made Quality

Custom made and wired, Right & Left ( the only Left Handed Stick Grip in the world ) hand matching Stick Grips.

Fits any Size

Fits stick OD’s from 5/8″ to 1-3/8+” — in other words, our Stick Grips fit ANY size stick tube.

Customizable

~5.73″ / ~14.5542 cm long with 6 individual switches ( 13 switch total possible ! ) providing 9 to 13 functions, depending on your selected switch combinations. No other Stick Grip for Sport Aircraft in the world has this many switches or functions ( note: ‘others’ claim they have 7 switches in their stick grips, when, in fact, they only have 3 plus 1 switches — the 1 switch I mention is actually made up of “4” individual switches to control pitch & roll trim, so they count each direction of their trim as a separate switch, hence they say they have 7 switches [ 3″ + 4” = 7 ]. Using this kind of logic, that’s why I say we have “9 switches total” ! ).

Extra Cable

Includes three feet ( ~5.5″ / ~13.97 cm of this included ~3′ / ~91.44 cm of cable is used inside the Stick Grip, therefore, ~2.5 feet / ~76.2 cm hangs out the bottom of the Stick Grip ) of custom made and color coded MIL-Spec and FAA Certified cable ( sheathing colored blue ) with 17 conductors, and each conductor has 19 strands of wire, making for a very strong and flexible wire yet small diameter ( ~0.335″ / 8.509 mm OD ) blue sheathed wire bundle:  10 — 20 gage, and 7 — 22 gage, wires.  Extra cable ordered will be added equally to each Stick Grip ordered.

Easily Maintainable and Repairable

Matte black China hat and Stick Grip; Red trigger ; EASILY maintainable and repairable – Want to change a switch?  Simply split the Stick Grip ( see Installation tab ), then using a rag with pliers, just pull the colored cap(s) straight off.  Then use a modified 5/16″ x 1/4″ drive long/deep socket ( see ‘Pricing’ tab ) to remove the nut retaining the switch.  Change out the switch(es), then install new switch(es), and reassemble ( it’s easy — really ).  All this is explained in the FAQ, too.

Pre-Wired and Installed Switches

Delivered with switches pre-wired and installed — YOU don’t have to wire it or install the switches !  Includes Pictorial Wiring Schematic and Installation Instructions.

High Quality, UL Rated and FAA Certified Stick Grip and Switches

Trigger, Toggle & Tactical Push-Button Switches are rated at:  6 AMP’s @ 12 VDC / 3 Amp’s @ 28 VDC ; SPDT ; 40K operations with a crisp tactile ‘click’, has the proper pre-travel and ounces of force, and does *NOT* turn ON ( make contact ) until the switch ‘no kidding’ clicks !  The push-button switch colored caps can be interchanged — red, green, black and light blue are standard ( yellow, orange, gray and white are also available ).  WARNING:  some other switches used in other stick grips ‘Turn-ON’ ( make contact ) if you bump them as little as 1/200th of an inch — ours WILL *NOT* do this !!!!!

Note:  we use SPDT push-buttons and toggle switches to keep the wire bundle as small in diameter as possible, therefore the mil spec blue sheathed wire bundle is still very flexible.

Two-Axis Trim Switch Rating

1 AMP at 12 VDC ; 500,000 operations [ 2 Relays required because the switch is a SPST in each direction and you need to reverse your Trim motor(s) — Radio Shack Catalog # 275-249, made by OEG, for example ].  When using our Stick Grips:  here’s a Trim Wiring Schematic using generic Relays ; here’s a wiring schematic using Ray Allen Relays ; here’s a schematic for Alex Strong’s Trim System to be used in conjunction with our 4-way Trim Switch.  Alex’s Relay is designed for single and dual control Stick Grip applications.  This device is non-shorting in the event opposite input are put in on Dual Stick Grip aircraft.  See Pricing tab for our Relay prices — our Trim Switch lasts 5 times longer and is easier to operate ( about 3/4’s the force ) than other expensive mil. spec. 4-way switches that take 40+ oz.’s of force to operate them ( which is a little too hard to push to safely be used for Sport Aircraft ).

High Impact and Lightweight

Made from a light weight, high impact yet extremely durable, high temperature tolerant injected ABS material that meets and/or exceeds FAR Part 23 Fire Retardant and Flash Resistant requirements, and is easily repairable. Completed Stick Grip only weighs approximately 12 oz.

Won’t Come Loose

Four brass 6-32 x 0.375″ long inserts are molded into the Stick Grip at the time of injection hold the halves together over and through your stick tube via stainless steel allen / socket head screws, and are rated at 385 lbs. of pullout force ( tension ) each. Three of the inserts provide a virtually unbreakable 3-point clamp over your aircraft stick tube. Other grips use just a single set screw to hold their grip on. And, no need to EVER glue our Stick Grip to your stick tube, or worry if the glue will hold, or worry how to get the glue off, if you ever need to remove the Stick Grip. NOTE: at Oshkosh 2003, we were told of an RV-8 builder who was killed when his glued on rubber stick grip came loose and slid up the stick tube, jamming into the underside of the instrument panel !!!

1) Two-Axis ( thumb operated ) 4-way switch ( N.O. SPST in each direction:  relays required )

75+% of the time, this is usually used for Pitch & Aileron Trim; OR — Pitch & Rudder Trim; OR — Pitch & COMM. flip-flop frequencies to inboard and COMM Select ( saves you money by not needing an audio panel ) or Ident to outboard ; works great with Ray Allen Trim Servo Systems ( and they have a Speed Adjustable Relay, too ! ), or with any linear actuator used for trim ( Relays required ) ; OR — step COMM frequencies UP and DN & flip-flop COMM frequencies to inboard & flip-flop radios or transponder Ident to outboard ; OR — sweep spot lights, 35 mm or video cameras, computer cursors, select CD’s and the CD track, etc.

2) Red ( index finger operated ) Trigger Switch ( N.O. SPDT )

99.99+% of the time this is the Push-To-Talk ( PTT ) ; OR — 35 mm camera, video camera, audio recorder, paint ball or propane machine gun, etc.

3) Red ( thumb operated ) Tactical Push-button or Toggle Switch on the thumb side of the China Hat

95+% of the time, this is a vertically mounted ON/OFF/(ON) SPDT Toggle Switch for flaps, canard belly board, or speed brakes — now you don’t have to hold the switch UP to raise things ( the limit switch shuts OFF the motor ) ; OR — (ON)/OFF/(ON) SPDT Toggle Switch for wing spoilers, cowl flaps, step COMM frequencies, rudder trim ; OR — ON/OFF SPDT Push-button for landing light, main fuel pump, strobe lights, auxiliary fuel pump, taxi light, nav. lights, smoke, cockpit lights, pitot heat ; OR — Normally Open (N.O.) Push-button for COMM flip-flop, Ident, step COMM frequencies, etc. ; ALSO, we have ON/OFF/ON, ON/NONE/ON and ON/OFF Toggle Switches.  NOTE:  parenthesis around the word *ON* [ (ON) ] in the Toggle Switch descriptions above means that the toggle switch is momentary in that direction.

4) Black Tactical ( thumb operated ) Push-button half way down the Stick Grip (thumb) side

ON/OFF SPDT Push-button for aux. fuel pump, main fuel pump, strobe lights, landing light, taxi light, nav. lights, smoke, cockpit lights, pitot heat, etc. ;  OR — N.O. Push-button for autopilot disconnect, CWS, COMM. flip-flop, Ident, step COMM. frequencies, etc.

5) Blue Tactical ( pinky finger operated ) bottom Push-button

95+% of the time, this is an ON/OFF SPDT for Aux. Fuel Pump ; or, can be for strobe lights, fuel transfer pump, landing light, taxi light, nav. lights, pitot heat, etc. ;  OR — N.O. Push-button for autopilot disconnect, CWS, COMM flip-flop, Ident, step COMM. frequencies, etc. ;  OR — a horizontally horizontally mounted Toggle Switch [ (ON)/OFF/(ON) SPDT ] for rudder trim or aileron trim.  NOTE:  parenthesis around the word *ON* [ (ON) ] in the Toggle Switch descriptions above means that the toggle is momentary in that direction.

6) Green ( thumb operated ) Tactical Push-button on knuckle side of the China Hat

95+% of the time, this is a N.O. SPDT push-button for Engine Start ( relay not required ) ;  OR, can be for COMM flip-flop, Ident, step COMM frequencies, autopilot disconnect, CWS ;  OR — ON/OFF SPDT push-button for main fuel pump, strobe lights, aux. fuel pump, landing light, taxi light, nav. lights, pitot heat, smoke, cockpit lights, etc. OR — a vertically mounted Toggle Switch [ (ON)/OFF/(ON) or ON/OFF/(ON) SPDT ] for flaps, speed brakes, belly board, spoilers, cowl flaps.  OR — a horizontally mounted Toggle Switch [ (ON)/OFF/(ON) SPDT ] for rudder trim or aileron trim ( Relays required ).  ALSO, we have ON/OFF/ON, ON/ON and ON/OFF Toggle Switches.  NOTE:  parenthesis around the word “ON” { (ON) } in the Toggle Switch descriptions above means that the toggle is momentary in that direction.

** A few definitions:  VDC = Volts Direct Current ;  PSI = Pounds per Square Inch ;  GPM = Gallons Per Minute ;  LPM = Liters Per Minute ;  AMP = Amps or Current ;  CB = Circuit Breaker ;  N.O. = Normally Open ;  N.C. = Normally Closed ;  S & H = Shipping and Handling ;  CA = California **

Still having trouble deciding what switches to install where in your Custom Stick Grips after thoroughly reading my Stick Grip pages ?  Then . . .

Click here to see JD’s Pet Peeve Safety of Flight Issues that may help you in deciding your Stick Grips customized switch functions.

Still have questions, just call JD any afternoon Pacific Time after 1330-2200+ M-S for help .

HOW TO ORDER
Click Here for a PDF explaining “How to Install” our Stick Grip(s)

Our Stick Grip has a 1″ diameter hole in the bottom to allow your stick tube to fit 2.125″ up inside it *.gif .  A 29/64″ hole is drilled 0.5″ down from the top of your stick tube ( at the proper clock code to ergonomically fit your hand and wrist ) for the Stick Grips lower boss and screw to clamp through, and the Stick Grip halves to clamp over.  You DO NOT *ever* glue our Stick Grip to your stick tube!!!  NOTE:  at Oshkosh 2003, we were told of an RV-8 builder who was killed when his glued on rubber grip he was using as a stick grip in his plane came loose and UP, jamming into the underside of the instrument panel!!!  Spacers are available if your aircraft stick tube OD is less than, or greater than, a standard 1″ OD stick tube [ i.e. — to fit Lancair 200’s, 235’s, 320’s, 360’s and older Legacy’s ( newer Legacy’s are now 1″ stick tubes ), use a short 3/4″ spacer ; for Canard’s, Lancair IV’s, Lancair ES, Nemesis NXT, and any side stick aircraft, use a long 3/4″ spacer ; or to fit the Van’s RV-4, 6, 7, 8, & 9, and Harmon Rocket, co-pilots’ — and the Van’s RV-10’s, RV-12’s, RV-14’s, Glasair’s, Glastar’s, F-1 Rocket’s and Expresses pilot AND co-pilot — use a 7/8″ spacer to adapt your aircraft’s stick tube ).  For the larger 1.125″, 1.25″, 1.375″ or any size OD stick tubes — such as used in military aircraft, Mig’s, T-38’s, L-39’s, T-34’s, P-51’s, SN-J’s/T-6’s, Yak’s, CJ-6A’s, Marquette’s, Extreme 300’s, and Falco’s, for example — a custom 5″ long spacer will fit inside your larger ( custom spacer mounting instructions ) than 1″ OD stick tubes ID nicely ( see ‘Pricing’ tab above, and provide your stick tube ID on our order form, if you want us to make it for you ).  A simple Stick Grip Installation Drawing is provided with your Stick Grip order ( see “How to Install” *.pdf above ).  The Stick Grip splits in half for *very* easy maintenance.  Replacement parts can be easily installed by you, and are available by simply contacting  INFINITY Aerospace  via the Excel order form.  NO other Stick Grip in the world has this much versatility at this low of a price !

1. Do I need the co-pilot Stick-Grip?

If you can answer YES to *ANY* of the following, then YES, you will need a co-pilot Stick Grip ( also see Switching Command below ) :

* You will soon want to get just as proficient flying your own aircraft from the co-pilot seat as you are in the pilots seat like everyone else does, so you’ll certainly need matching Stick Grips ;
* Most instructors will not fly with you unless they have a matching co-pilot Stick Grip that controls every thing the pilots Stick Grip does so that they can take command from you if/when you screw up ;
* You will be checking out others in your aircraft so they can fly it and will want to give them command with a Stick Grip that has the same functions as the pilots ;
* You will be checking out others to help them get some stick time before they fly their aircraft, so you will want to give them command with a matching Stick Grip that has the same functions as the pilots ;
* You’ll be on a cross country and want your buddy to spell you, so you give them command while you eat your sandwich, or take a picture, or take a nap, or etc. ;
* If there is a problem with the pilots Stick Grip, you just jump over to the co-pilot seat, or reach over and use the switches on the co-pilot Stick Grip ;
* You’ll have a spare Stick Grip and/or parts for the pilots Stick Grip if you get in a pinch ;
* Young Eagles are aviation’s future, so they’ll want a Stick Grip with all the buttons, too.  You just don’t arm it using the Co-Pilot Isolate Switch so you can trip the ground wires to isolate the co-pilot Stick Grip.  See the ‘Pricing’ tab to buy the switch.

This may help / think of it this way — you’re taking your hotty trophy wife, or girl friend, out to a real swanky place.  She’s dressed to kill in a strapless evening gown with the girls popping out and with a full length slit up her right leg ( like Jessica Rabbit ), but she hasn’t shaved her right half of her body for over a year — do you still want to take her out for all to see ?!?  Sooo, do you want a Fighter Style Stick Grip for the co-pilot Stick Grip in your Pride and Joy that you’ve dreamed about building all you life, that you’ve spent years building and thou$and$, for all to see, or are you just going to throw a POS over / back there after reading the above ?!?
So, YES, ALL 2+ seat aircraft should have matching Stick Grips !  Also, the cockpit looks MUCH better to have a matching set of Stick Grips rather than a POS on the co-pilot side / back there, and is a marketing tool if you ever sell your aircraft ( your aircraft will look like a finished product ) !!!

And again, like it says at the beginning of my Stick Grip pages — You’ve spent years and thou$and$ on your dream machine !  Do you imagine flying your Pride and Joy with a Military Style Stick Grip ( from either seat ), or with other attempts at making a stick grip, such as using just a soft bike grip, ski pole handle or dowel rod that you stuck a couple of cheap switches in, which would be labor intensive to make and wire at best, that turn ON ( make contact ) if you bump them 1/200th of an inch ( our Stick Grip switches WILL NOT do this — ONLY ones that won’t! ), and that the only way to mount it is to glue it on ( then always wondering not if, but when, it will come off ) ?!?

2. How do I switch command / control of the Stick Grips between the pilot and the co-pilot?

Some builders ( who are also electronic whizzes ) have designed a little Black Box like the military and airlines have, that controls the functions and priorities of each Stick Grip ( which is VERY cool to have! ).  But / Or, for us Electronically Challenged ( like me ), a real simple way is to wire the ( #1 ) 4-Way Switch and the #2 Trigger Switch in parallel with each other in each Stick Grip, and gang all the grounds / commons of switches #3, #4, #5 and #6 together to a Lever Lock Toggle Switch mounted horizontally in the panel for the side-by-side aircraft, or in the left aft console across from the pilot’s left hip for the tandem builders, to isolate the pilot Stick Grip switches from the co-pilot’s switches.  If someone is messing with the 4-Way and / or Trigger Switch(es) who shouldn’t be, the side-by-side builders can just reach over and break their passengers arm ? .  BUT, the tandem builders can’t do this, so they will either wire all the grounds / commons of the 6 switches in the rear seat Stick Grip to the Lever Lock Toggle Switch, disarming all switches in the rear seat at once — or better yet, they will wire the 4-Way and Trigger Switch to a second Lever Lock Toggle Switch in the left console to disarm those 2 switches separately from switches #3, #4, #5 and #6 ( an RV-8 builder told me at Oshkosh 2000 that he calls the 2nd Lever Lock Toggle Switch that disables / disarms his 4-way and Trigger Switches in his co-pilots Stick Grip his ‘Grandson Switch’. )  [ At Sun ‘N Fun 2004, a husband and wife RV-8 flying team said they put both Lever Lock Toggle Switches by the pilots left hip in the console.  His wife said that way “when he has his heart attack in the front seat, I (she) can reach the 2 Lever Lock Toggle Switch by the pilot’s ( husband’s ) left hip from the back seat, and take back Stick Grip command, and land the plane.”  Good idea !  See the ‘Pricing’ tab to buy the switch.

3. How do I rotate a toggle switch?

Simply take your Stick Grip apart and use a ground down long 5/16″ x 1/4″ drive socket to remove the nut holding the toggle switch in place ( see ‘Pricing’ tab for a dimensioned picture of the socket so you can make your own, or we also have them made up in stock ).  Remove the toggle switch, rotate it, and re-install it.  Then remount your Stick Grip.  See the ‘Pricing’ tab to buy the socket.

4. How do I remove a switch?

The colored cap just snap onto the push-button switch.  Pull the cap off using a shop rag and a pair of pliers ( the rag is so that the pliers teeth don’t mark the cap ) and see if the switch works normally, AND check continuity.

If the switch works without the cap, there is nothing wrong with the switch.

When the caps are injected by the mfg., there is a little ‘tit’ where the cap material is injected into the molded, called the ‘Gate’.  Sometimes the Gate needs trimmed off.  Also, there may be a berm around the perimeter of the cap.  So we trim them off.
This very rarely occurs, but if the Gate and / or berm does not get trimmed off enough, they can drag on the walls of the counter-bored hole.  By trimming the Gate and / or berm off, and / or scrapping excess paint out of the counter-bored hole with a slim Exacto Knife, the switch will work fine.

But, if you are changing out a switch, follow the above to remove the colored cap.  Then simply take your Stick Grip apart and use a ground down long 5/16″ x 1/4″ drive socket to remove the nut holding the push-button switch ( or toggle switch ) in place ( see ‘Pricing’ tab for a dimensioned picture of the socket so you can make your own, or we also have them made up in stock ).  Install the new switch, then remount your Stick Grip.  See the ‘Pricing’ tab to buy the socket.

5. Is there a trick to mount my Stick Grip onto my stick tube?

Yes.  Simply follow the Installation Instructions on the back of your Pictorial Wiring Schematic that came inside your Stick Grip package ; BUT, leave the Red Trigger out until you get your Stick Grip to close nicely on your stick tube.  THEN, install the Red Trigger.

Now, if you are having trouble getting your Stick Grip to close on your stick tube, either you are pinching a wire, or your stick tube is lager than 1 inch ( our Stick Grip ID is 1 inch at the bottom, and 0.993″ to 0.998″ ID where the Lower Boss goes through your stick tube per instructions so the Stick Grip clamps snugly onto your stick tube ).  Ya see, the problem with 1 inch extruded tubing these days ( since the time when we made our Stick Grip injection mold in ~1992 ), 1 inch extruded tubing is now no longer 1 inch OD!  It is +/- 0.015″ in diameter ( just like a 2 x 4 is not really 2″ x 4″ ) !!  And if your stick tube is powder coated, your stick tube is way over 1 inch OD, which is the ID of our Stick Grip.  You will have to polish the powder coating off your stick tube, and maybe even polish a little of the stick tube metal off, until your stick tube is 1 inch where your stick tube goes up into the bottom of the Stick Grip, and 0.993″ to 0.998″ ID where the stick tube lives inside the Stick Grip around the lower boss area.  As always, using a corrosion inhibitor on the bare metal inside and out ( any bare metal, for that matter ) is a good idea.  As always, call JD any afternoon after 1330 Pacific Time M-F if you have any questions.

6. Do I need to label the Stick Grip switch functions?

Well, you can’t see the labels while you are maneuvering the plane ( my Navy stick grips were not labeled ), so what’s the point/why bother — you built the plane and well know what they do anyways. When driving you can’t read the buttons on your steering wheel, and the front side of the steering wheel is not even labeled — you just have to remember what they control. But, if you want a reminder or want to show someone you are letting fly your plane the Stick Grip functions, the standard thing to do is to simply label a picture of your Stick Grip functions and print it on the back of your Pocket Check List ( PCL ), then laminate both sides. A few, and even fewer DAR’s, still want the Stick Grip functions labeled? Simply use a label maker with white or gold letters on a black or clear background, then use tweezers to place the labels and NOT your oily fingers, or you’ll have problems with the labels like you did on your models when your were a kid using your fingers. Some have had their Stick Grips laser engraved.

7. Can I run trim inputs from both Stick Grips into 1 trim circuit?

If I run the inputs from TWO Stick Grips into ONE trim circuit — meaning that either the Pilot or Co-Pilot Stick Grip China Hat trim button causes the trim to move ( just connect BOTH “B” from both Stick Grips to C1A+, and “P” pins from both Stick Grips to C1B+, so that either Stick Grip can run the pitch trim ), is that OK? The issue would be that _IF_ the two trim switches were moved opposite — pitch UP on one, and pitch DN on the other, then both C1A+ and C1B+ would be grounded.  What happens in that case?”

The Trim Relay Deck has two SPDT relays per axis ( be it a single axis  Relay Deck, or the three axis  Relay Deck ).

There are then four possible conditions dependent upon the switches:

1) Both inputs ( C1A+ & C1B+ ) are not grounded = both sides of the motor are grounded ;
2) The “A” input is grounded = the motor “A” output will have power, “B” side will remain at ground ;
3) The “B” input is grounded = the motor “B” output will have power, “A” side will remain at ground ;
4) Both inputs are grounded = both sides of the motor will see power.

Condition #4 is concerning to some as is this may seem to cause a short or overload — not the case.
With both sides of a typical two wire motor connected to +V, there will be no current flow as there is
no path to ground.  In the case of two Stick Grips wired to control the Relay Deck, if one Stick Grip is pushed for
left trim and the other to right trim, the motor will simply stop.  To isolate the co-pilot Stick Grip ( if you are
flying with a “button pusher / Grandson”, simply add our Co-Pilot Isolate Switch that will disconnect the ground to that appropriate Stick Grip(s).

8. How to touch up your Stick Grips

I see your Stick Grip is well seasoned.
If you want it to look near new again, lightly sand it up with 400 grit sandpaper to smooth out any scratches.  Then *lightly* wipe it down with acetone using a paper towel (hopefully you use a paper towel that doesn’t leave flakes — our paper towels we buy don’t do that).  Then pull the colored caps off using a pair of pliers and a shop rag.  The shop rag is to keep the pliers teeth from marking the caps.  Tape off the stems of the switches, tape off the red trigger, tape off the stems of the switches, tape off your toggle switch(es) if you have them, tape off your cockpit, and *lightly* fog paint on the Stick Grips with SEM 39103 paint.  Depending on room or outside temp they should be dry in 1+ hrs, but I’d leave them alone overnight.  If it’s raining, foggy, or just very humid, the paint will dry with an amine blush :-/ .  You’ll need to warm up the Stick Grip, and maybe warm up the paint.  Also, before use, we use a paint shaker for 5 minutes on each rattle spray can before every use.  If you don’t have a paint shaker, a hardware store will shack it up for you.  Or, you’ll get a good exercise shaking it up by hand .

9. Certificate of Conformance for your custom Stick Grips

Ref:  Components, Materials, Manufacturing, and Inspection Certificate of Conformance

INFINITY Aerospace  Part Numbers:

CERTIFICATE OF CONFORMANCE

This is to certify that the parts listed on your Pictorial Schematic via our IA Part Number, and their internal components and materials, have been inspected and conform and comply with our requirements, and delivered per your custom request.

Infinity’s Forever, 

JD

Item

Prices (subject to change) CC Prices (subject to change)

Stick Grip Assembly Sets — we ship anywhere in the world !

Stick grip — Right-Hand ( YES, they come with all the switches installed and pre-wired ! ) $225.00 $234.00
Rush Order $275.00 $286.00
Stick grip — Left-Hand ( YES, they come with all the switches installed and pre-wired ! ) $225.00 $234.00
Rush Order $275.00 $286.00
Threaded Bottom for War Bird Sticks
( Yes, custom pre-wired Right or Left hand, with 1.5″ OD x 18 thread ! )
$325.00 $338.00
Rush Order $375.00 $390.00

Accessories / Parts — we ship anywhere in the world

Spacer — 3/4″ ID x 1″ OD x 2.125″ long for Lancair 320’s, 360’s & older Legacy’s { new Legacy’s now have 1″ stick tubes } made from 6061-T6 material ( click on 3/4″ for a CAD *.PDF of the spacer) $20.00 $20.80
Spacer — LONG 3/4″ ID x 1″ OD x 2.875″ long with full length slot for side sticks such as for Canards, and for Lancair IV’s and ES’s made from 6061-T6 material ( click on 3/4″ for a CAD *.PDF) $25.00 $26.00
Spacer — 7/8″ ID x 1″ OD x 2.125″ long for Van’s RV-10’s, RV-12’s, RV-14’s, Glasair’s, Glastar’s, Rotoway’s, F-1 Rocket’s and Expresses; and for the RV-4, 6, 7, 8, & 9 co-pilot made from 6061-T6 material ( click on above for a CAD *.pdf ) $20.00 $20.80
Custom Spacer(s) — to fit 1-1/8″, 1-1/4″ or Other stick tube OD’s ( these are mfg. one-at-a-time ) made from 6061-T6 material Click here for installation instructions. $75.00 $78.00
Stick Grip Pivot Spacers(s) — to fit 0.875″ OD and 1.00″ OD, and larger OD, stick tube ID’s ; made from 6061-T6 material $75.00 $78.00
Cable – Extra 17-conductor, 19 strands per conductor, mil spec Cable bundle
Note: Stick Grip(s) already come pre-wired with ~2.5 feet / ~76.2 cm of cable coming out the bottom of each Stick Grip. Extra cable ordered will be added equally to each Stick Grip ordered ( price per foot )
$3.50 $3.65
Push-button switches ( 3 kinds ) Extra/Replacement — click here for switch dimensions
ON/OFF ( P/N: 36 ), and Normally Open (N.O.) ( P/N: 32NO ) & Normally Closed (NC) ( P/N: 32NC ) Momentary Push-buttons ; all rated at 6 AMP’s @ 12 VDC / 3 Amp’s @ 28 VDC ; SPDT ; 40K operations with a crisp tactile ‘click’, has the proper pre-travel and ounces of force, and does *NOT* turn ON ( make contact ) until the switch ‘no kidding’ clicks !
$15.00 $15.60
Toggle switches ( 5 kinds ) Extra/Replacement — click here for switch dimensions
ON/NONE/ON ( P/N: ST1-1 ) ; ON/OFF/ON ( P/N: ST1-2 ) ;
(ON)/OFF/(ON) ( P/N: T37 ) ; ON/OFF/(ON) ( P/N: T38 ) ;
and ON/OFF ( P/N: 1055 ) Toggle Switches ; all rated at 6 AMP’s @ 12 VDC / 3 Amp’s @ 28 VDC ; SPDT ; 40K operations
$15.00 $15.60
4-way switches with non-corrosive flux already on pins for easier soldering and specs – Extra/Replacement. Note: when you order a 4-way switch for our Stick Grips, the China Hat is glued on. If you do not want that, just let us know in advance. $25.00 $26.00
China Hats Extra/Replacement $1.00 $1.05
Colored Caps Extra/Replacement
Std. colors: red, black, light blue and green — click here for Cap dimensions
We also have orange, grey, yellow, and bone white
$ 1.50 $ 1.60
Relay Deck six, 10 AMP each ( please specify 12, 24 or Combo VDC ) for Pitch Trim, Roll Trim and Flaps ( or Speed Brakes ) ;
OR — for Pitch, Roll, and Rudder Trims ; OR — for any other reversing motor relay needs ; click here for Relay Deck Wiring Schematic ( circuit board is only ~0.88″H X 4.0″W X 5.6″L, and weighs only 5.5 oz. )
$138.50 $144.00
Relay Deck, Single two, 10 AMP / 12 VDC each relay’s for Pitch Trim, Roll Trim, Flaps ( or Speed Brakes ) or Rudder Trim ; OR — for any other reversing motor relay needs; click here for Single Relay Deck Wiring Schematic
( circuit board is only ~0.88″H X 4.0″W X 2.0″L, and weighs only 2.0 oz. )
$53.85 $56.00
Flap Relay, Radio Shack Catalog # 275-218 $17.20 $18.00
Flap Relay Socket, Radio Shack Catalog # 275-220 $5.40 $5.65
Trim Relay, Radio Shack Cat. # 275-249, click here for schematic for Alex Strong Pitch Trim $10.75 $11.20
Black stick tube Base Boot to cover the hole in the cockpit floor ( not big enough to cover the hole in the RV-8 co-pilot cockpit floor ) ; Base Boot height — approx. 8″ tall ; and the Base Boot rectangular frame dimensions are :
Outside rectangular dimensions — 5.25″ x 6.375″
Thin Chrome Stainless Steel Flange — 0.6″; fits 0.75″ to 1.25+” OD stick tubes
$25.00 $26.00
Stick Grip Sock ( 1 comes with each Stick Grip ) Extra/Replacement
To protect your Stick Grip from dust while building, and from the elements after you’re done building, & between each flight
$1.00 $1.05
Modified 5/16″ x 1/4″ Drive deep/long Socket to remove nuts holding switches in place $10.00 $10.40
7/64″ Allen Wrench Screw Driver to remove Allen screws to split your Stick Grips in half; Ball Nose Allen Wrench with a nice non-slip rubbery handle grip. $10.00 $10.40
Lever-Lock Toggle Switch to select between Pilot and Co-Pilot Stick Grips of which one is armed; can also be used for a Flap Switch, Speed Brake(s) Switch, or as a MAG Switch ( P/N : 633-2205 ) $20.00 $20.80
Flaps or Speed Brake UP or DN Limit Switch for UP and DN indication ( IA P/N 23AC2 UP and DN switch click here for a *.pdf drawing with specs ) SPDT NO and/or NC, Rod Actuator with 4-40 tapped threaded hole for easy switch adjustment ; Can also be used for retracts, canopies, hatches and doors; Silver Contacts ; Screw Termination ; with mounting holes $60.00 $62.40
Mini Flux — I found a non-corrosive paste flux that works great for cleaning things before soldering. $5.00 $5.20
16 to 20 Pin Connector — Still looking for a good one ! $TBD $TBD

Shipping & Handling — we ship anywhere in the world

Shipping and Handling for everything is via US Postal Service, cost TBD for each order. $TBD

ALSO, PLEASE NOTE — many ( most? ) of you already know this, but we just learned ( Nov. 2009 ) what the extra credit card “fees” credit card ( CC ) companies / banks are charging us vendors! IF your CC is a company / corporate CC / government CC, a foreign CC, a Rewards CC ( which all CC’s are these days ), and / or your Billing Address for your CC is wrong, and / or your Billing Address is a Post Office Box ( POB ), they charge us vendors an extra 4% !!! Therefore, if you are using one of these type of CC’s, and / or your Billing Address is wrong, and / or it’s a POB, there will be an extra small charge ( sorry ).

Specs, Data, Prices, and Parts List are subject to change without notice — we ship anywhere in the world !

PLEASE remember, as you read my Stick Grip pages, since there are 65,536+ possible Stick Grip switch combinations, we just don’t have them built up sitting around here on the shelf.  So, Please, please, PLEASE allow us some time, for we are VERY busy.  We usually take about 2 to 3+ weeks to make up your Custom Stick Grips.  But after a major air show ( such as SnF & OSH ), and/or allowing for before and after the holidays, it takes us longer.  So, please allow us at least 4, to probably 6, weeks ( just like any other custom items from any other business ) for delivery of your CUSTOM Stick Grip(s) — which are assembled custom per your specifications ( any world wide pandemic &/or zombie apocalypse, vendors, outside suppliers, air shows, holidays, illness, and vacations do sometimes drive this delivery time, too ).  And please know, we will endeavor to get them to you as fast as possible.
Also, after reading the above, there’s no need to then ask us when you’ll receive your custom Stick Grips — the answer above will not change; and there’s no need to call or e-mail us wondering when you’ll get your custom Stick Grips if 6 weeks hasn’t passed — we won’t respond because I need to cut down on my e-mails :-O .

You will receive an e-mail with a tracking number from Stamps.com when we mail your order to you; and if you are paying via credit card, you will receive an e-mail with a credit card receipt from Square Up.

Thanks Loads for your understanding, business and support ? !

You’ve known for years this day was coming, so don’t wait until the last minute to order !!
OR — see ” Rush Order ” prices in the Pricing Tab.

Stick Grips — we ship anywhere in the world !

The easiest thing to do ( and preferred way which GREATLY helps us out ) is to simply fill out our Interactive *.pdf Stick Grip Order Form after saving it to your desktop and click ‘Submit by e-mail’ in the top right corner of the order form.  NOTE:  IF you are using a MAC computer, you need to use the PC version of the FREE Adobe Reader for our Interactive *.pdf Stick Grip Order Form to work.  So, follow the instructions in RED below.
Or, you can print the filled in order form then FAX it to us with your credit card number for foreign orders.
Or, mail your order form to us.  We’ll contact you with a total to mail a check for.

You can NOT fill out our Interactive *.pdf Stick Grip Order Form in your browser any more ( stupid @#$% browser people removed that feature :-/ ), so simply click on the blue bar above and save this *.pdf  ‘Stick Grip Order Form’ file to your computers desktop or hard drive BEFORE filling it out.  Then, download the FREE Adobe Reader for PC’s to your PC or MAC ( if you do not already have it ).  Then, simply fill out our interactive Stick Grip Order Form and, if you have Thunderbird or Outlook e-mail program, click “Submit by e-mail” at the top right of our form when you have completed the form.  If you want to know if we receive your e-mail order, go to ‘Options’ in your e-mail and click ‘Return or Delivery Receipt’ before you send your e-mail.  NOTE:  if you are using a web based e-mail service such as g-mail, hotmail or yahoo, the “Submit by e-mail” button on our Interactive *.pdf Stick Grip Order Form will not work.  You’ll have to fill out the form, print it, scan it as a *.pdf, then e-mail it to us at HOS@InfinityAerospace.com .

Individual parts — we ship anywhere in the
world

For Stick Grip Accessories, Extra and/or Spare Parts, fill out our Interactive Excel File Order Form
Just follow the simple instructions in the yellow box at the top of the Interactive Excel Order form.

If you want to know if we received your e-mail order for Stick Grip Accessories, Extra and/or Spare Parts, go to ‘Options’ in your e-mail and click ‘Return or Delivery Receipt’ before sending the order form.

Still having trouble deciding what switches to install where in your Custom Stick Grips after thoroughly reading my Stick Grip pages?  Then . . . Click here to see JD’s Pet Peeve Safety of Flight Issues that may help you in deciding your Stick Grips customized switch functions.  Still have questions, just call JD any afternoon after 1330 – 2200+ Pacific Time M-S for help ( I’m a night owl ) .

NEWS FLASH — We are now taking pre-orders for our left, center and right handed ( the only right handed HOT in the world ! ) 10 or 13 switch / 19 function customizable Throttle Handle and 3 lever Quadrant with individual lever friction ( HOT ) — we have $50K to go.


Related products

  • Stick Grip Pivoting Spacer (SGPS)

    VIEW PRODUCT
  • Area 51 Poster

    VIEW PRODUCT
  • Lighted Gear Switch ( LGS )

    VIEW PRODUCT
  • Custom Landing Gear Design

    (not taking on outside jobs, busy on own projects)

    VIEW PRODUCT
  • Wing Root & Flight Control Spherical Bearings for Canards

    VIEW PRODUCT
  • Emergency Release Valve and Blow Down Bottle

    VIEW PRODUCT
  • Infinity 1 High Performance Quick Build Kit Canard Sport Aircraft & UAV

    VIEW PRODUCT
  • Canard Retractable Main Landing Gear

    (none available until further notice)

    VIEW PRODUCT
Military Style Stick Grips ( HOS ) last modified on November 28, 2022 by JD

Our Info


INFINITY Aerospace

During the apocalypse, call or e-mail us for our physical address.
PHONE: 619-448-5103
FAX: 619-448-5176

SKYPE: kingvulcan007

Navigate


  • Home
  • About Us
  • Featured Products
  • Coming Soon
  • What Else?
  • Contact Us

Clock


PACIFIC TIME

ZULU / GMT TIME

TOUCH & GOS


Since March 1996:
1,163,318

Contact Us


Operating Hours:
Monday – Saturday
1330 – 2200+ Pacific Time — I’m a night owl
You can park your plane(s) in front of our hangars &/or office here on Gillespie Field (SEE).

Copyright © 2023 · INFINITY Aerospace · All Rights Reserved | login